

How To: Simple newsletter solution using Nintex Workflow for Office 365
Table of contents:
The article is a continuation of the post describing creation of a simple newsletter using SharePoint Designer 2013, written here. This time I would like to show, how the similar solution can be made using Nintex Workflow for Office 365.
Preparations
Just as it was for the SharePoint Designer solution, this time the application is also built using two, custom SharePoint lists, in a dedicated Team Site:
- Newsletters, built of columns:
- Message title (Title, Single line of text, required)
- Message body (Body, multiline text, HTML formatting, required)
- Outbox, built of columns:
- Campaign name (Title, Single line of text, required)
- Recipients SP (Recipients_SP, People or Group, SP Groups allowed, multiple choice)
- Recipients Email (Recipients_EMAIL, multiline text, Plain text)
- Send date (SendDate, Date Time, required)
- Test delivery (TestDelivery, true/false)
- Sent (IsSent, true/false)
- Newsletter to be sent (Newsletter, Newsletters’ list lookup, required)
The workflow
Using a workflow built on Nintex Workflow is far more comfy than using SPD 2013, at least of two reasons: you can set a schedule to run the workflow (so there is no need to use pausing and having the workflow running all the time since its first launch). Secondly – Nintex allows you to easily send e-mail to the external recipients too.
[tds_info] Keep in mind, that sending e-mail to external recipients using “Send email” action in Nintex Workflow makes, that the data is processed outside of your tenant, on Nintex infrastructure, which can be located in a different region than your tenant. Please consider all pros and cons.[/tds_info]
Here again, the workflow’s main goal is checking the Outbox list, to gather a collection of not sent items, having the Send date older or equal current date and executing delivery of these messages.
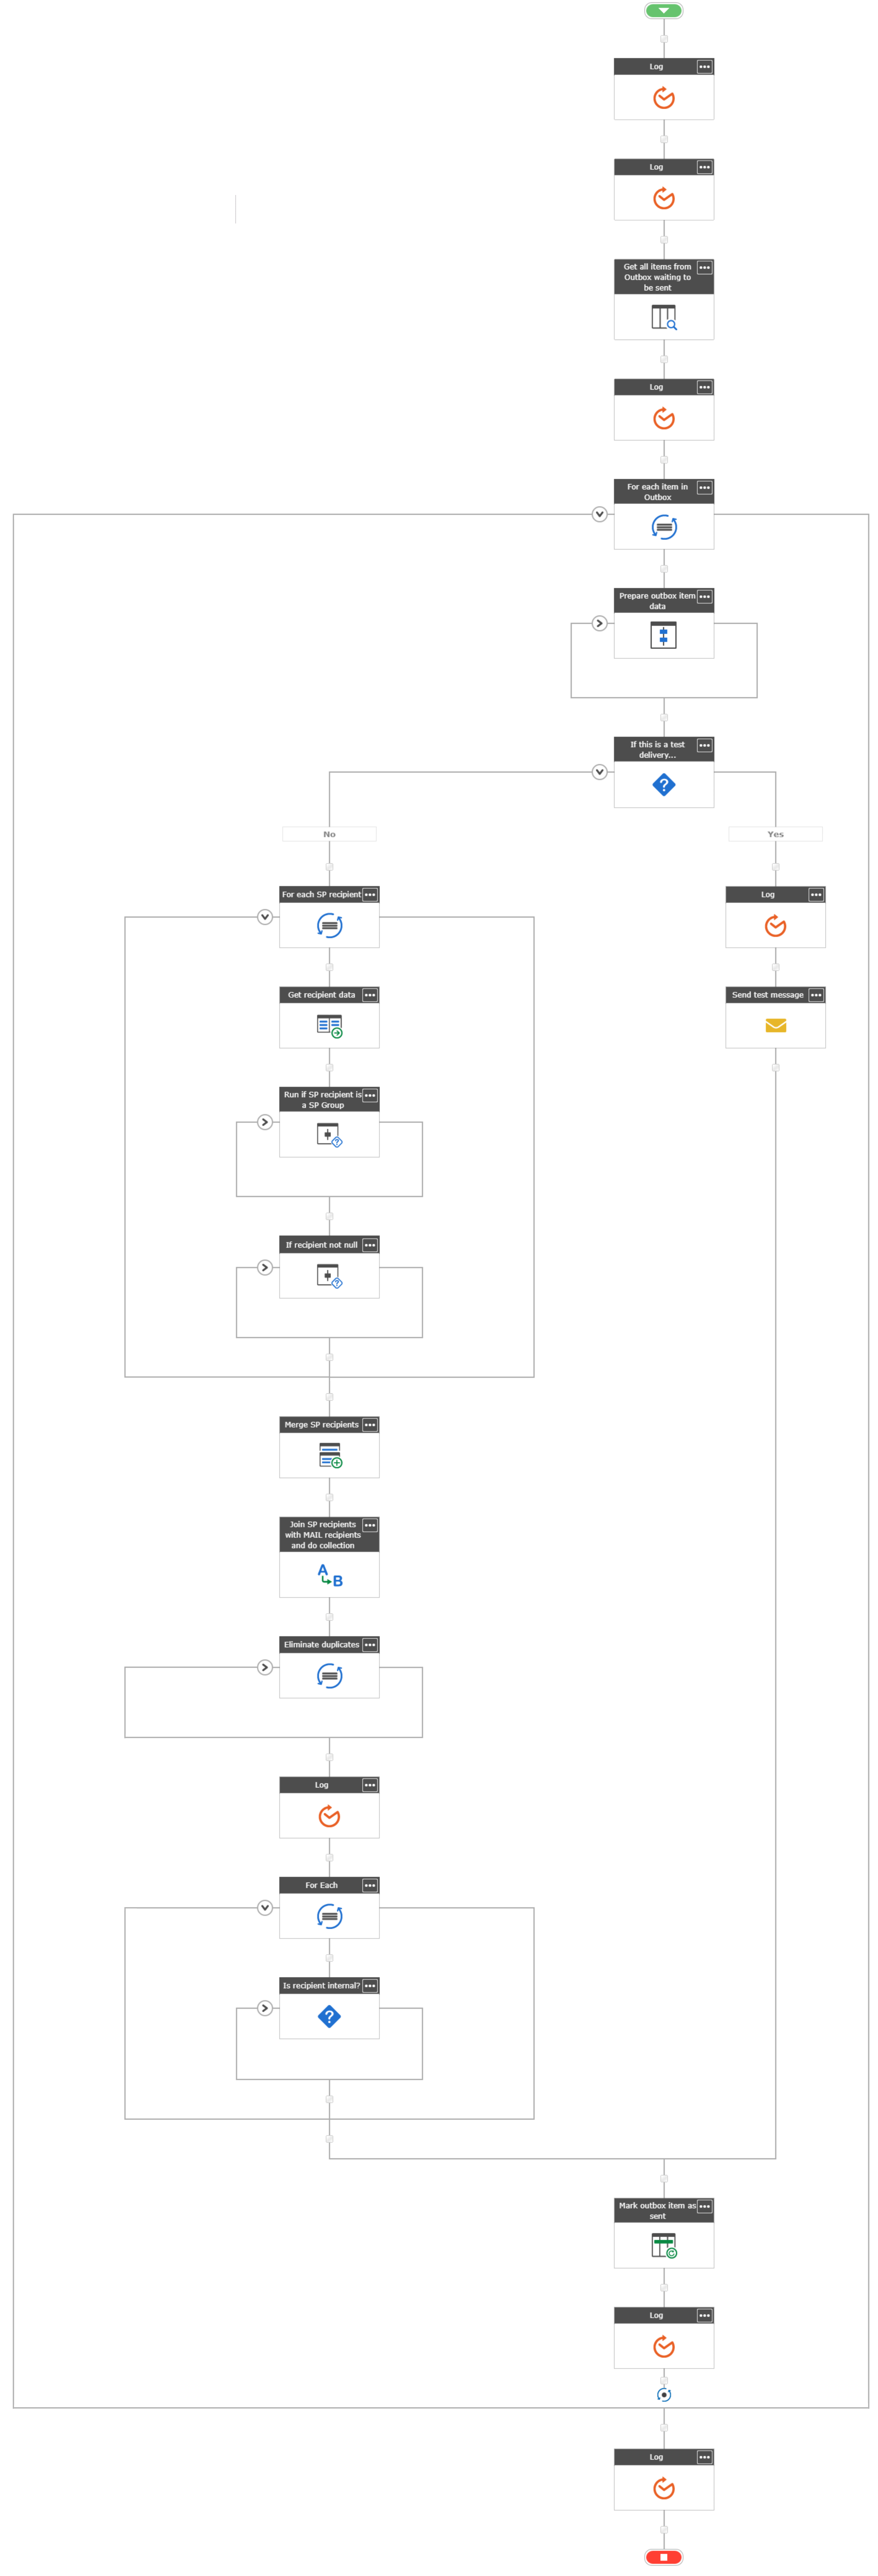
So how does the “Nintex-version” of the solution look like? The workflow itself is not very complicated, however it contains tens of actions and operations. It looks like below (some blocks are collapsed, to make it more readable):
Initiation Form Parameters
These are optional. You can as well sew them inside the workflow, not to initiate them when triggered. I am personally a supporter of doing maximally generic solutions that are capable of being used in other sites and tenants. The list of initiation parameters is shorter than in the SPD version:
- var_Now_DateTime – date and time of the first run.
- var_CurrentSiteRelativeURL_Txt – relative URL to the specific site (if not in the root site), where the application is hosted (starting from /).
- var_InternalEmailDomain_Txt – internal domain – so that the workflow is able to distinguish internal mails from external.
- var_AllowExternalEmails_Bool – generally, to allow or not sending e-mails to the external recipients.
Gathering list of items to be sent and delivery data
The workflow, using “Query List” action is calling the “Outbox” list to get all items, having send date older or equal to current and which are not marked as sent.
Then, for each item from that collection it is getting delivery name, newsletter’s title and body, flag whether this is a test delivery and list of recipients from SP and EMAIL fields.
What important is that “RichHTML” field replaces paths to images and URLs from SharePoint with their relative paths. This has to be changed before delivering to the e-mail client, so the workflow has to replace the relative paths with the absolute paths. It is doing that using the “Regular Expression” action.
Test delivery
If the message is marked as a test delivery, the workflow prepares the message to be sent as it does for productive sent, however it is only sending it to the user who created the item in the Outbox. After the message is sent, process marks it as “Sent”.
Preparation for the productive delivery
Workflow, for each element from the Recipients_SP field checks, whether its “Account” property contains claims (“i:0#.f|membership|”). If it does, it strips it and adds the e-mail to the collection. If not, then it assumes this is a SharePoint Group and then, using the “Web Request” and the following request URL:
{Workflow Context:Current site URL}/_api/web/SiteGroups/getByName('{Variable:var_Recipient_SP_Txt}')/Users
Gathers list of its members. Then, for each member it collects it e-mail address and adds it to the recipients collection.
Duplicates removal
Then the workflow joins recipients from SP and EMAIL fields. The string is split using the “Regular Expression” action into a collection. Next, it checks for each element fro the collection whether it is not duplicated.
[tds_warning] The “Remove duplicates” action works in a case-sensitive mode, therefore if you have two addresses written with upper or lower letters they will be treated as two different records.[/tds_warning]
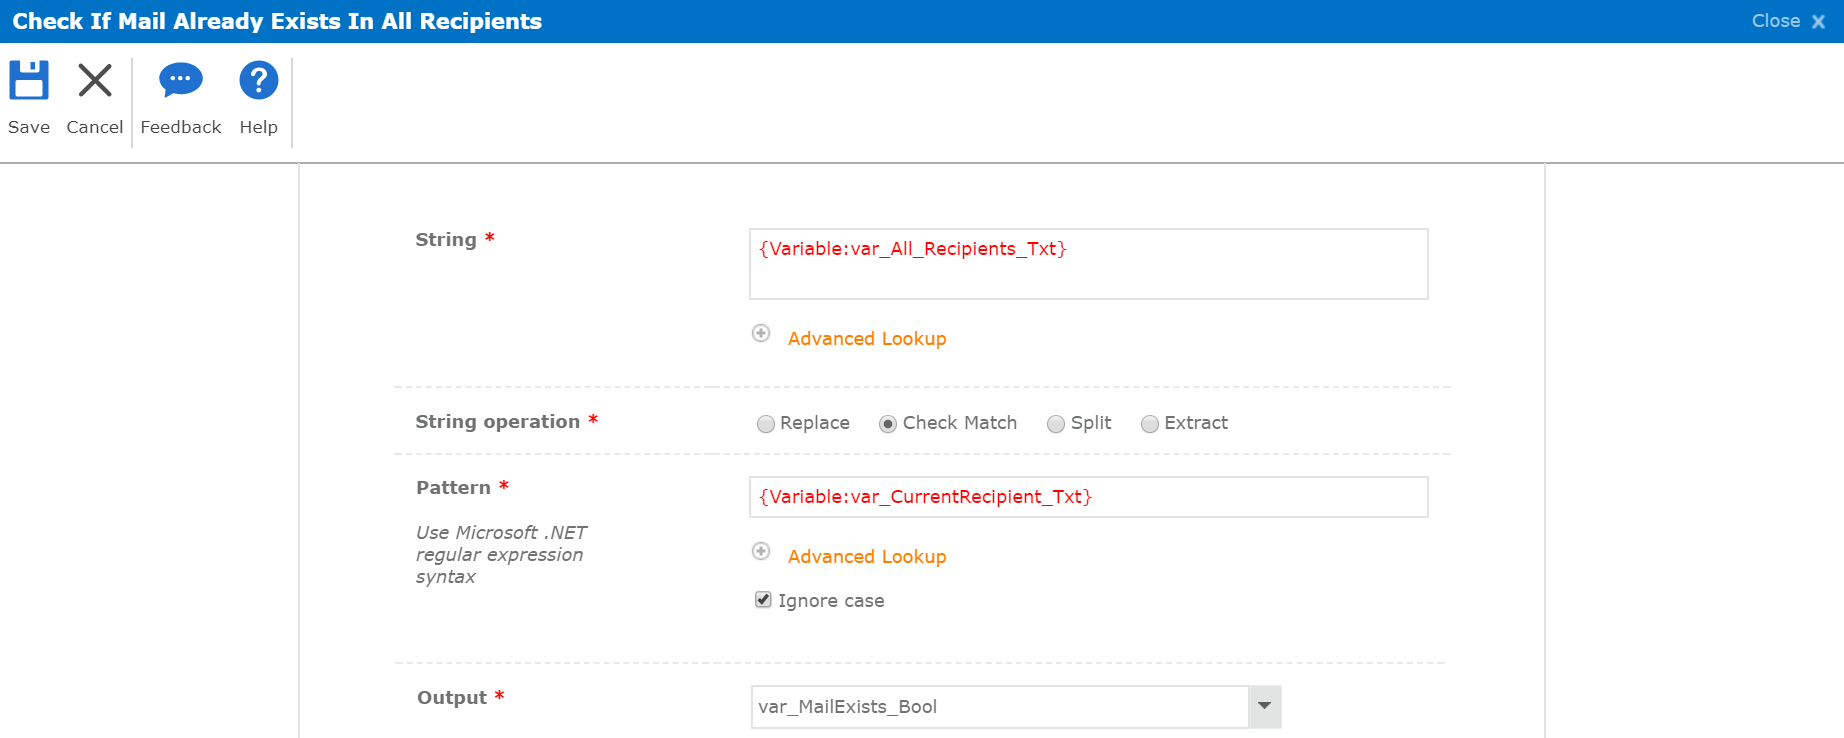
Process is removing duplicates using the “Regular Expression” and the “Check match” option with “Ignore case” setting turned on – this way it is really feasible to prepare a final recipients collection having no duplicates.
Productive delivery
The process then moves to productive delivery. For each element from the collection it is doing the same set of operations: prepares e-mail message using the “Send Email” action and sends it to the recipient. Doing that, it also checks if the recipient is allowed to receive the message – if this is an external recipient, but the setting says process cannot send to externals, it moves on to the next e-mail address. Delivery to external recipients is done using the “External email and attachment” option:

After all e-mails are sent, process marks the item in the “Outbox” list as “IsSent” and moves to the step no. 1, so it pauses until next trigger date.
Operation
Since June this year, in Nintex Workflow for Office 365 a new feature is present – scheduled workflows (source).
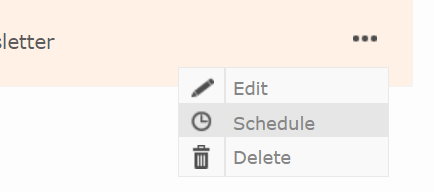
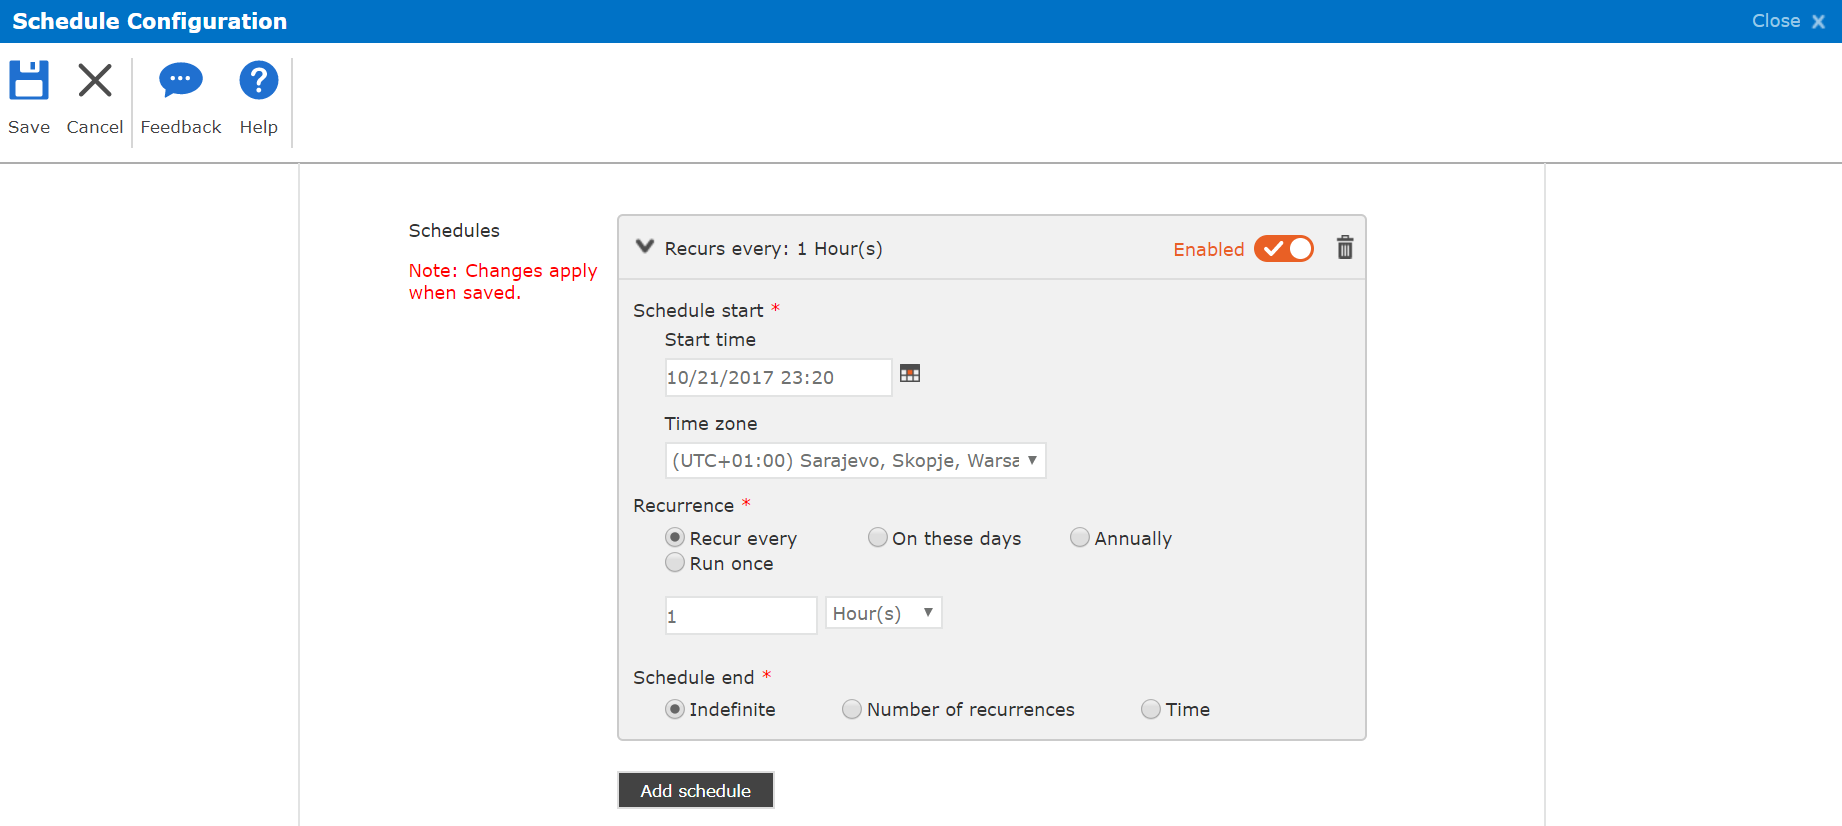
Thanks to that, it is possible to set how often the workflow should be triggered, so there is no need for simulating such behavior using pausing. That way, the process will be automatically executed within the prepared schedule.
[tds_note] The smallest interval is 1 hour. Unfortunately there is no way to set it to more often.[/tds_note]
Do you like my solution? Would you like to know about it or would you like to implement it in your premises/ tenant? Leave a note in comments or just contact me directly!


Berlin
hey, I am new to Nintex workflow. I am suppose to do a general announcements/newsletter do you think this workflow would work for my product?
Tomasz Poszytek
As a general idea yes. You can follow the steps to implement it. It shows a general solution, yours might be a bit more specific. But still, as something to start with it’s enough. Good luck!