

Unlock and lock Excel spreadsheet using Office Script
Table of contents:
I was recently trying to use Power Automate to write to an Excel worksheet, when I found out that the file is password protected. I was trying to find any action to let me unlock it, but I failed. After some research I realized this can be done using the power of Office Scripts!
How to use Office Script
When in Excel Online document (or desktop app), navigate to the “Automate” tab:

Straight from there, you can either use the option to “Record actions” or to write a “New script” on your own. Learn more about writing Office Scripts here.
Unlock Excel file
There are two possible ways to unprotect an Excel file, depending on your scenario:
- Unprotect – so that the protection is turned off (source);
- Pause protection – so that the protection is temporarily turned off, just for the current session (source 1, source 2).
Note: If you are planning to unprotect Excel file so that later you can use actions in Power Automate to manipulate it, the only option is to unprotect it. If, however, you plan to trigger a larger Office Script, where turning off the protection is just one of the steps, the better option is to just pause protection.
The code to unprotect the worksheet (and workbook) is the following:
function main(workbook: ExcelScript.Workbook, password: string) {
    workbook.getProtection().unprotect(password);

    workbook.getWorksheets().forEach(sheet => {
        sheet.getProtection().unprotect(password);
    });
}
As you can see, the script is first unlocking the workbook and then it is iterating through available worksheets to turn off the protection for each of them. You may of course want to get just the current worksheet, e.g., by select it using its name:
let currentSheet = workbook.getWorksheet("{WORKSHEET NAME}");
Lock Excel file
To lock the file, you need to call relevant “lock” function, that either locks the workbook (source), or resumes the protection (source). The code to protect the workbook and then each worksheet separately is as following:
function main(workbook: ExcelScript.Workbook, password: string) {
    workbook.getProtection().protect(password);

    workbook.getWorksheets().forEach(sheet => {
        sheet.getProtection().protect({
            allowAutoFilter: true,
            allowSort: true,
            allowFormatCells: true,
            selectionMode: ExcelScript.ProtectionSelectionMode.normal
        }, password);
    });
}
Note the options! The first parameter of the function defines the scope of protection and what users are allowed to do:
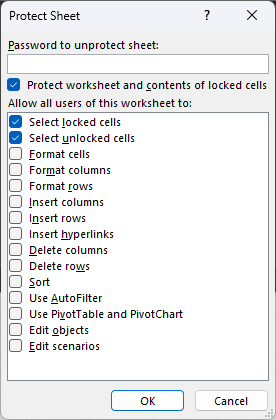
All the options must be passed as a valid JSON. The available list of options can be found here.
Usage in Power Automate
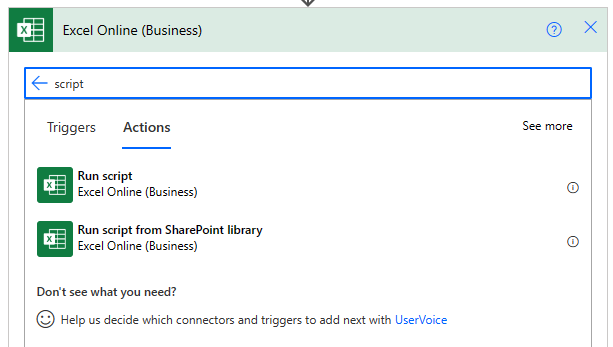
And then use the “Run script” action (or the other one, depending where your script is stored), to execute it:
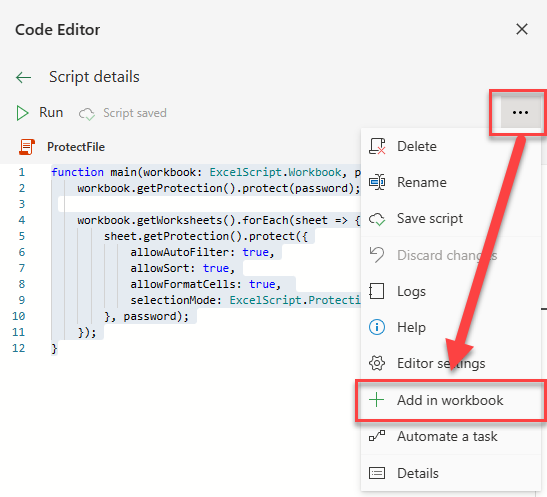
The final part is the integration with Power Automate. Save the scripts, add them to workbook (so that anyone having permissions to the workbook will be as well able to use the scripts):
Learn more about integrating Office Scripts with Power Automate here.
And that’s it! I hope this will help you a lot! 🙂