
Trigger WinAutomation from UI flows
Not so long ago I wrote a post where I was describing how to integrate WinAutomation with UI flows (here). It didn’t take much time for Microsoft to release a dedicated connector, that does the same thing, but well… Is much easier to use!
The general idea remains the same – UI flows is using WinAutomationController.EXE to trigger process and pass arguments.
Important! Be sure you are running the latest version of UI flows (1.1.76.20165 or higher) and WinAutomation (v. 9.2.1 or higher).
You can get the latest version from the links below:
UI flows: https://go.microsoft.com/fwlink/?linkid=2102613
WinAutomation: http://assets.winautomation.com/releases/WinAutomationSetup.exe
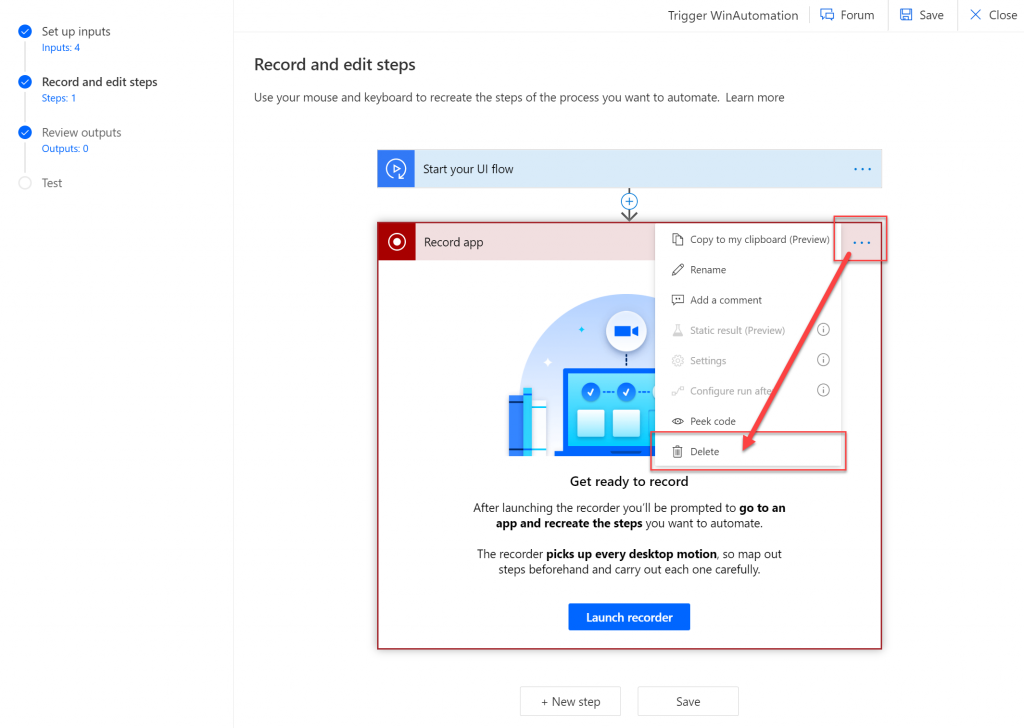
To use it simply navigate to a UI flows and create new flow (or edit existing one). Instead of using the “Record app” scope (you can remove it), that is present by default when creating new flow:
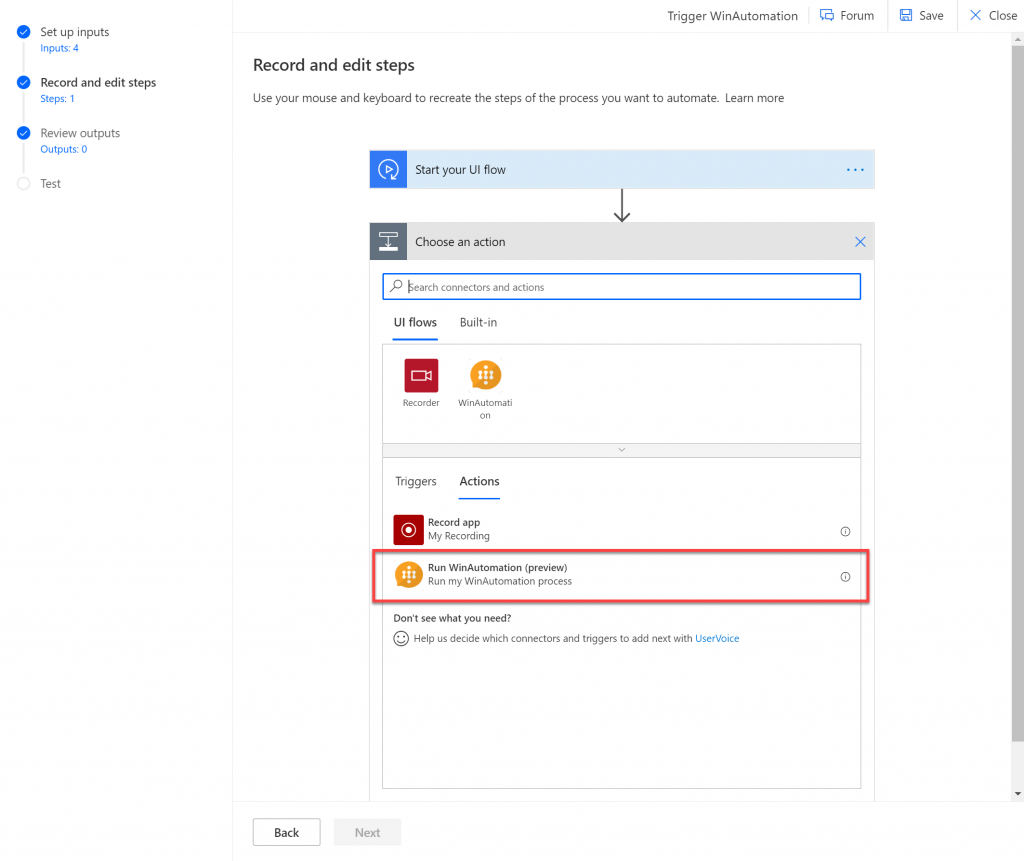
Add new action: “WinAutomation”:
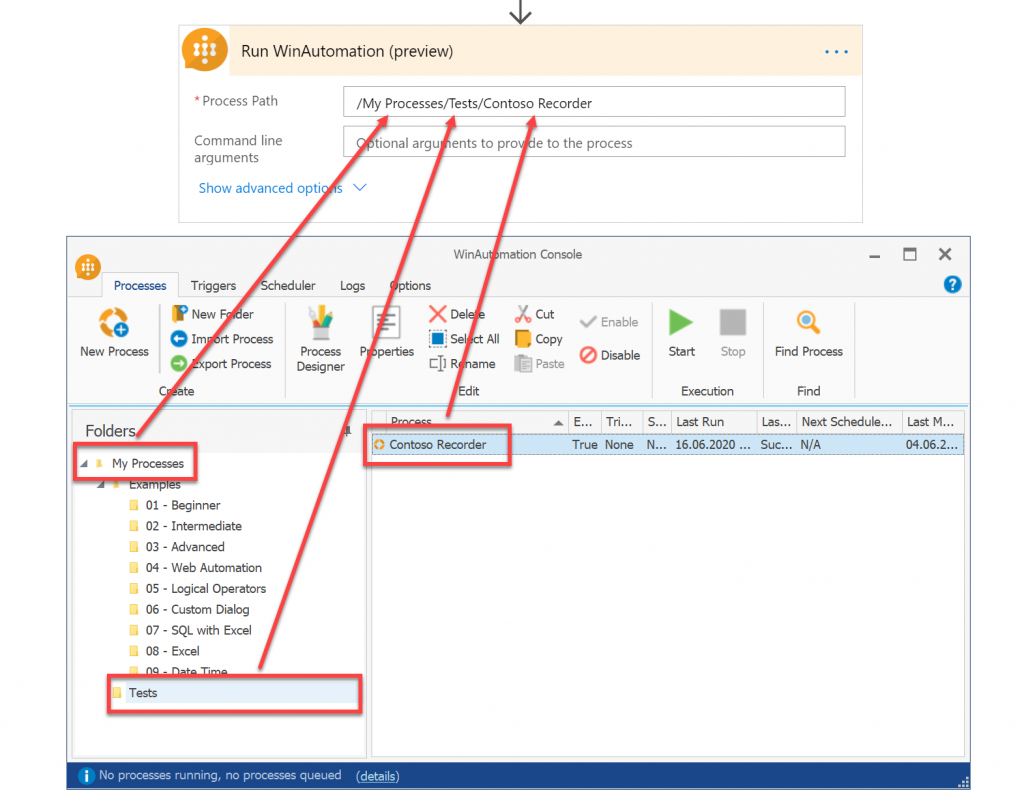
Once you add it, input path to your process, exactly the same as the folder structure in Processes Explorer, eg.:
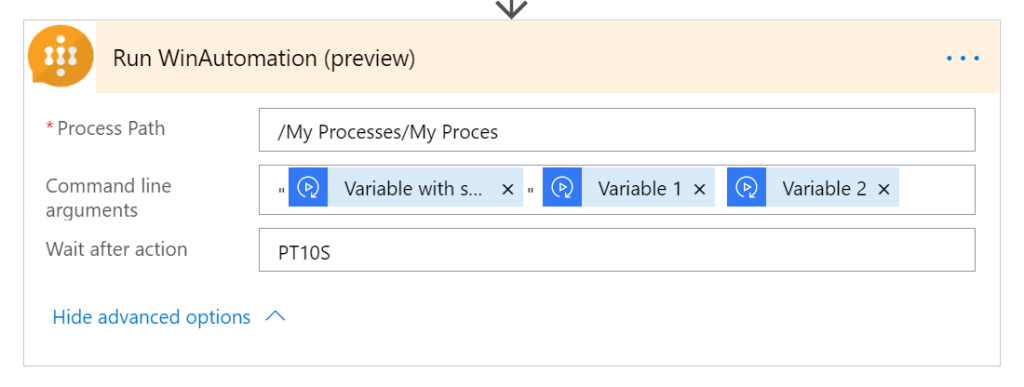
And then in “Command line arguments” field add space separated arguments, that you want to pass to the WinAutomation instance.
Important! If the values passed may contain spaces, remember to enclose the inserted variables with quotes! Otherwise they will be treated as separate values!
You can additionally configure how long should UI flow wait after executing this action, in case you’d like then to add another action to get value from UI (as one of the methods to get outcome form WinAutomation and to pass it back to UI flow):
I hope you find it useful. If you have any questions simply leave them in comments below!

