Xtensions – Nintex Workflow Cloud is becoming expansible
Table of contents:
It has already been announced couple of months ago, during the Nintex InspireX conference in New Orleans, in February this year, by Vadim Tabakam and Brad Orluk during their presentation “Extensibility on the Nintex Workflow Platform” and later on Nintex Blog.
The new, cool feature (that now is in beta preview), called “extensibility framework”. The tool that is allowing customers to add to the Nintex Workflow Cloud a custom REST API endpoints, that are “encapsulated” into ready-to-use actions. How does it work?
Nintex Xtensions – the basics
In 3 steps:
- Obtain your custom RESTful API JSON file with the Swagger definition or provide a URL to a Swagger definition.
- Create new “Connection” if your endpoint requires any kind of authentication.
- That’s it – now you can use actions built on functions defined in the Swagger file.
Step by step howto
I will try to present you how to do it. This tutorial is divided into 2 sections. First shows how to create a Swagger file, if your REST API doesn’t provide one. The second shows steps on using it in Nintex Workflow Cloud. You can as well go directly to the usage example at the end.
One last thing – for the purpose of this demonstration I chose Billiving (simple accountancy for small companies) service and their RESTful API (here).
Great. Let’s begin.
What if I don’t have a Swagger file?
Basically, if you code a custom REST endpoint, and you do it in Visual Studio, you can add Swagger add-in (ex. here and here) and the rest is done for you. In case you don’t have one or you are the endpoint is not yours, then you can try to follow the definition rules and create one in a Notepad, or (what I suggest) use restunited.com web based application. So – go there now and create your free account 😉
Step 1 – Basic
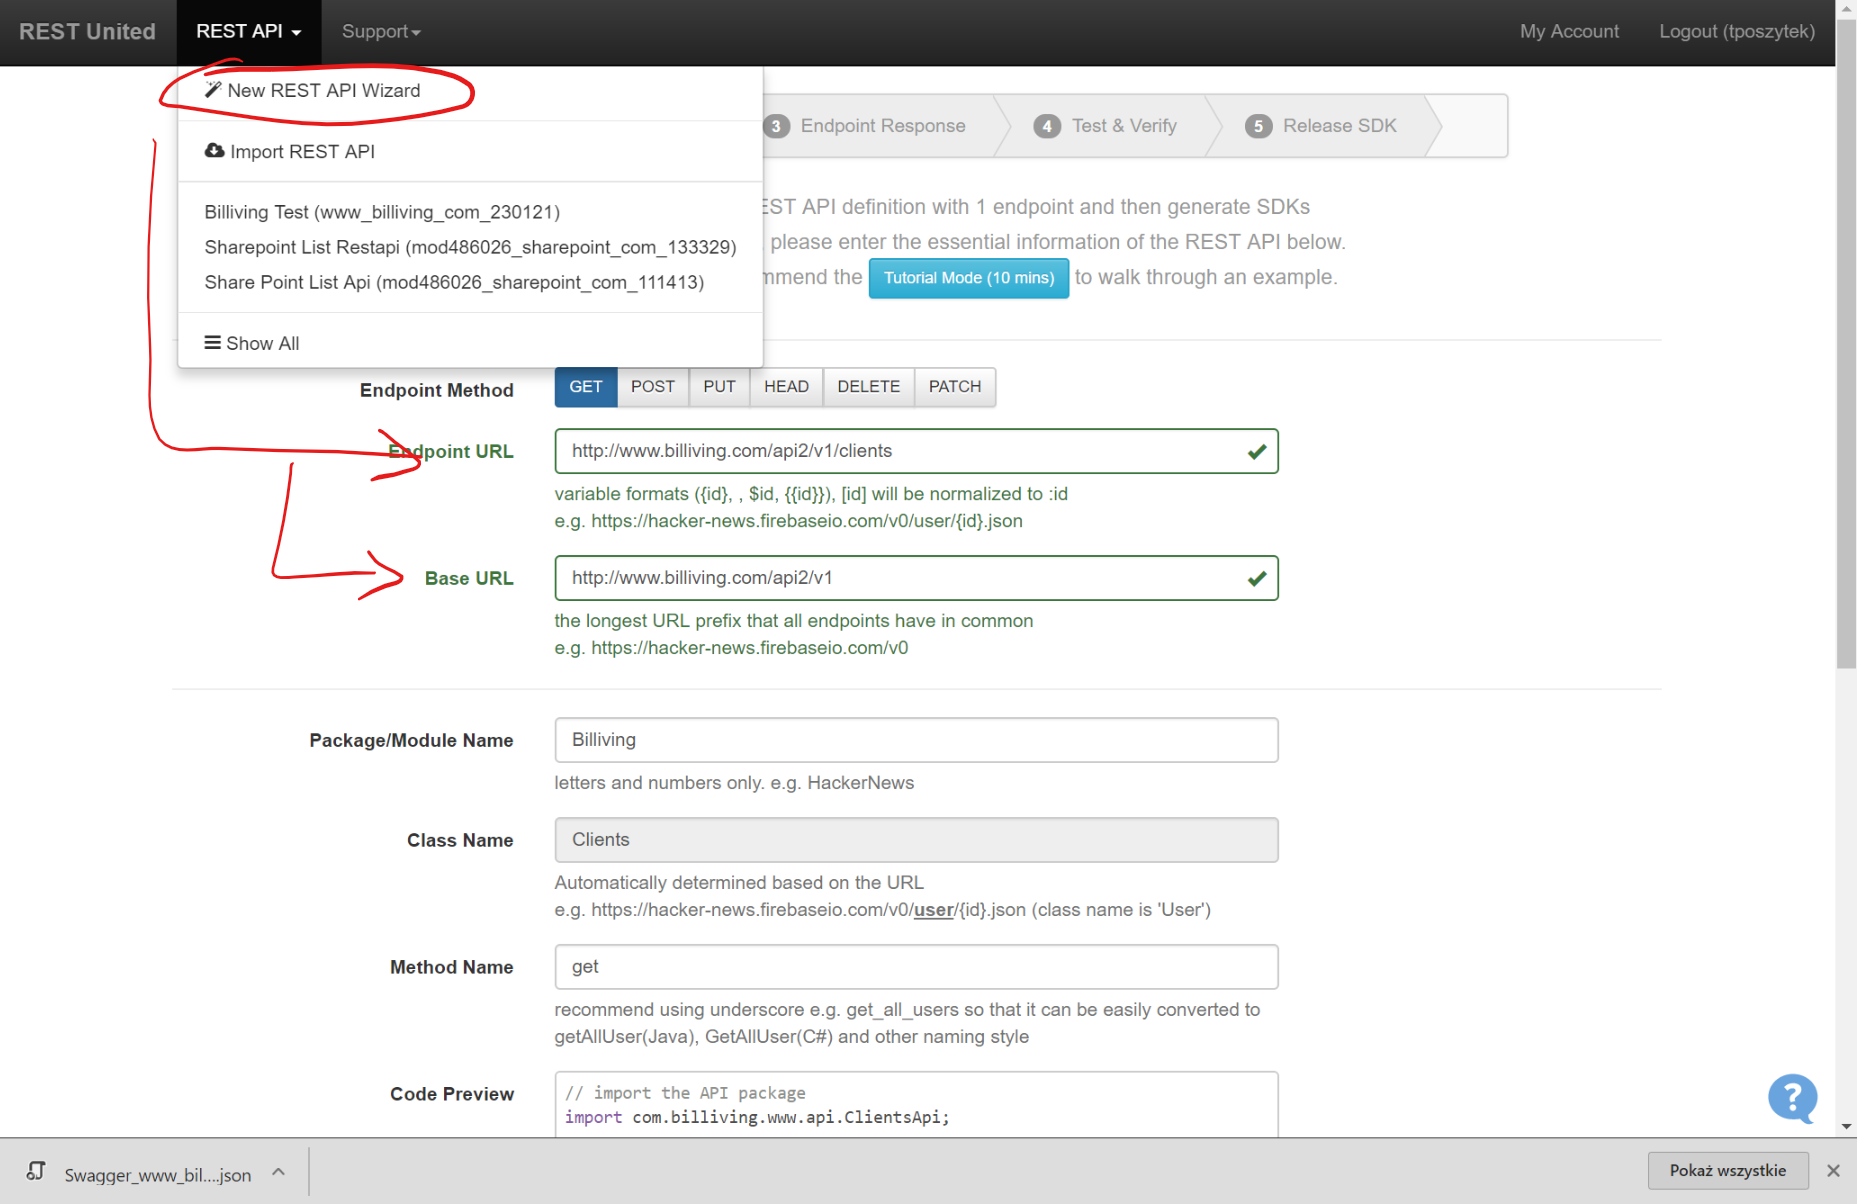
- Click “REST API” –> “New REST API wizard”:

- On the opened form, fill in the Endpoint URL and the Base URL. The Endpoint leads to a specific api operation. The Base URL is just the root of the API methods.
- Set the “Method Name” – this value will be used as the display name of the action, once it is imported into Nintex Workflow Cloud, so make it descriptive.
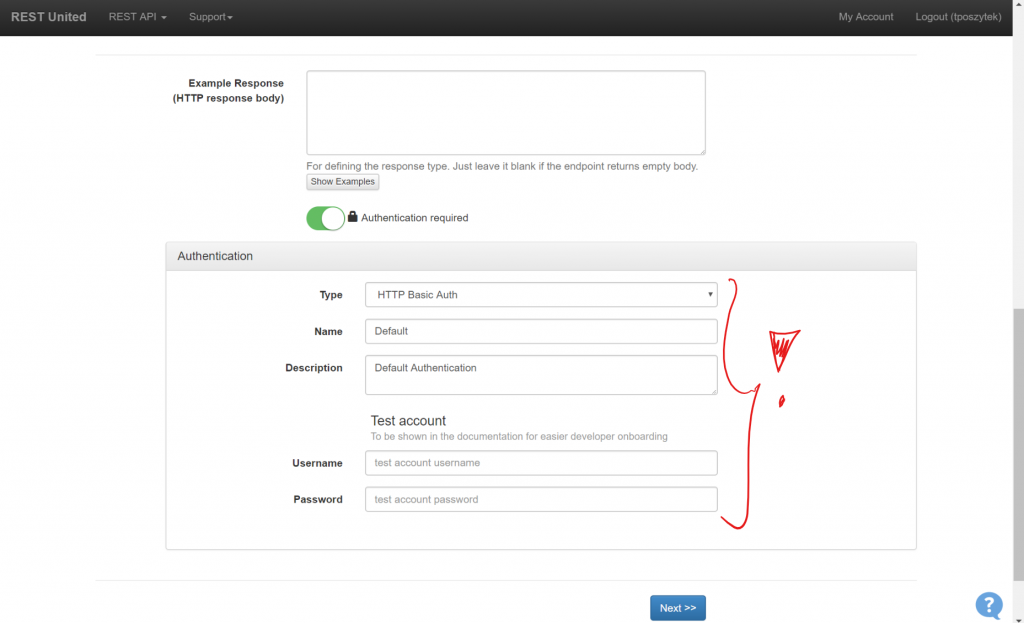
- Set the “Authentication” – choose a proper type and provide default data. This will be later used by the “Connections” in NWC, to allow you to create a connection to call the endpoints:

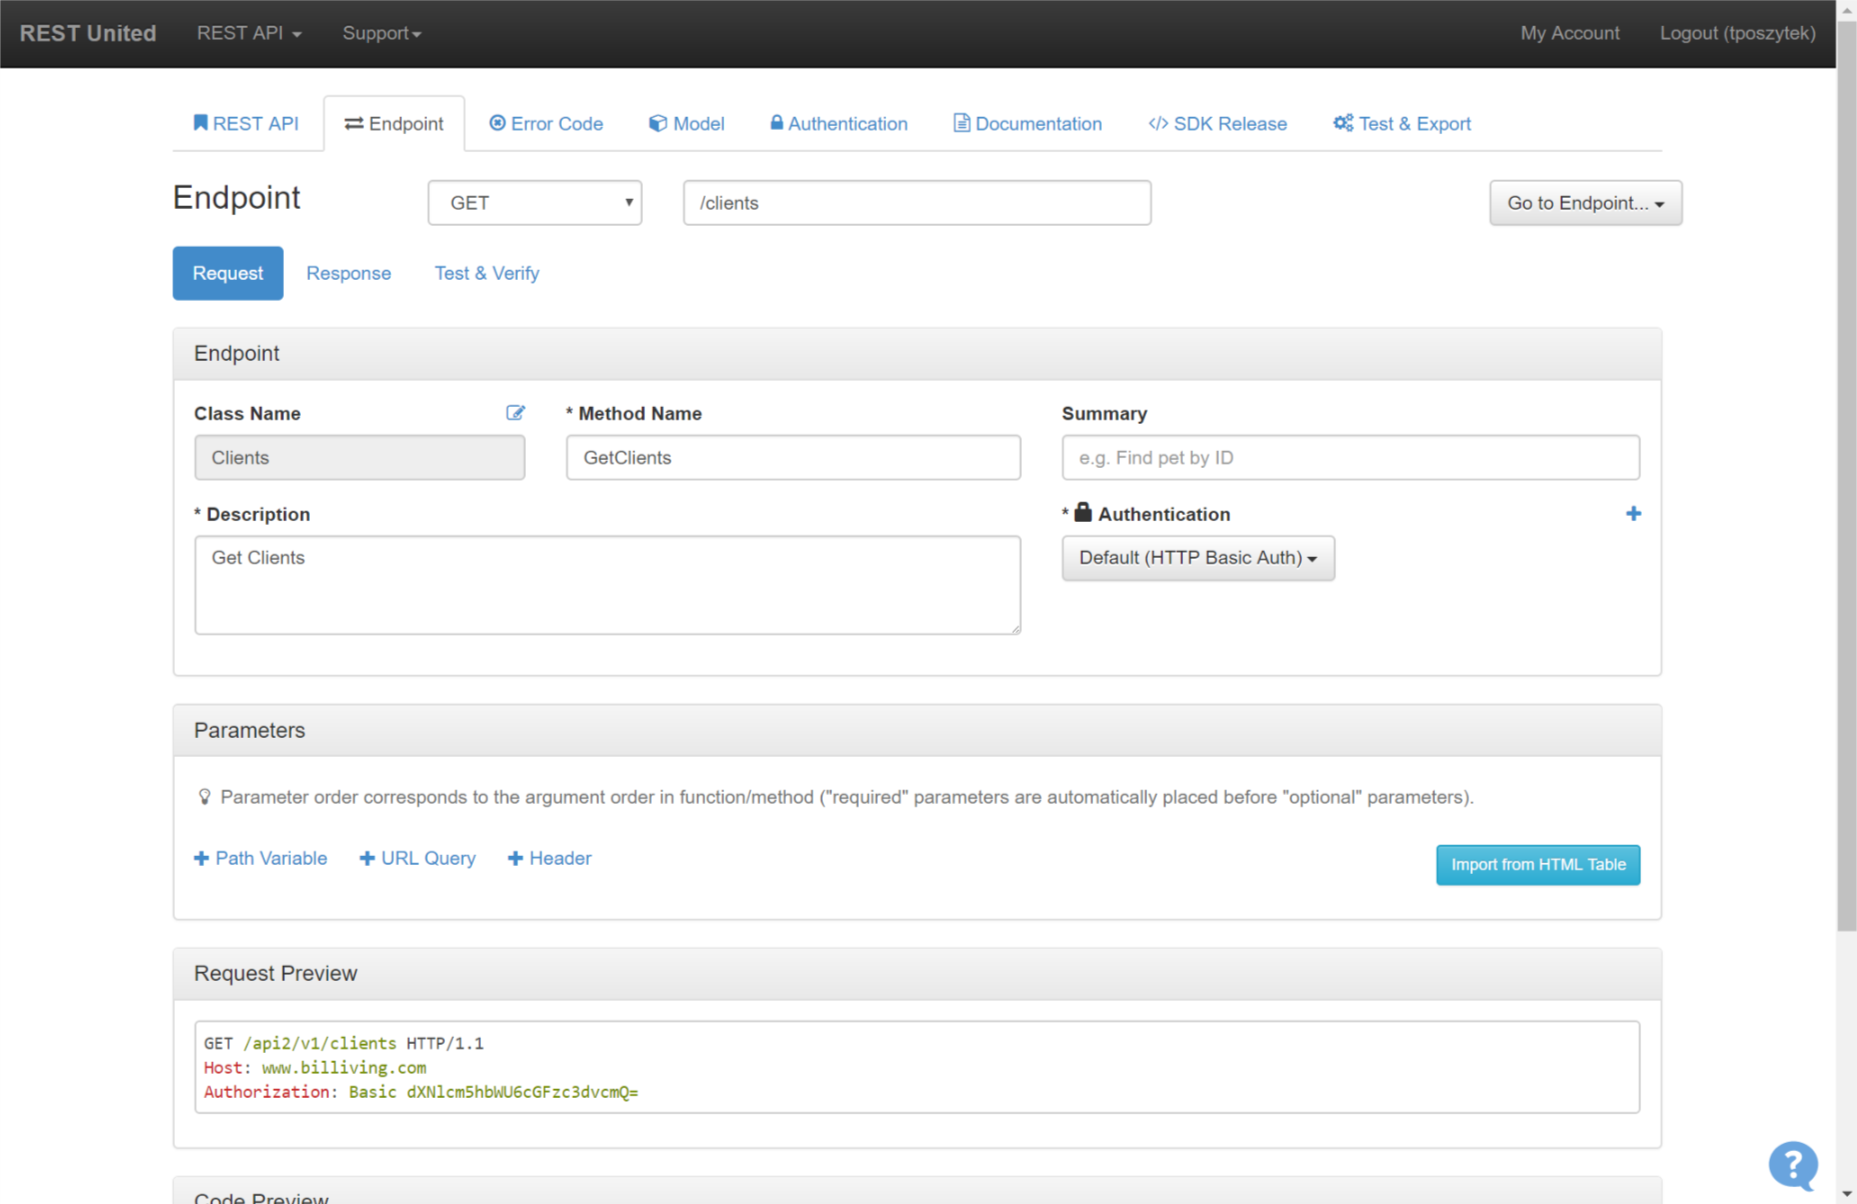
Step 2 – Endpoint Request
Set details of the “Request” – you need to provide additional variables that will be used in the path, or query elements for the URL:
 (if that was a POST method, you should also provide data for the “RequestBody” if is required).
Step 3 – Endpoint Response
Set details of the “Response”. It’s crucial, as this way once the action is present in NWC, you will be able to store the response in the variable:
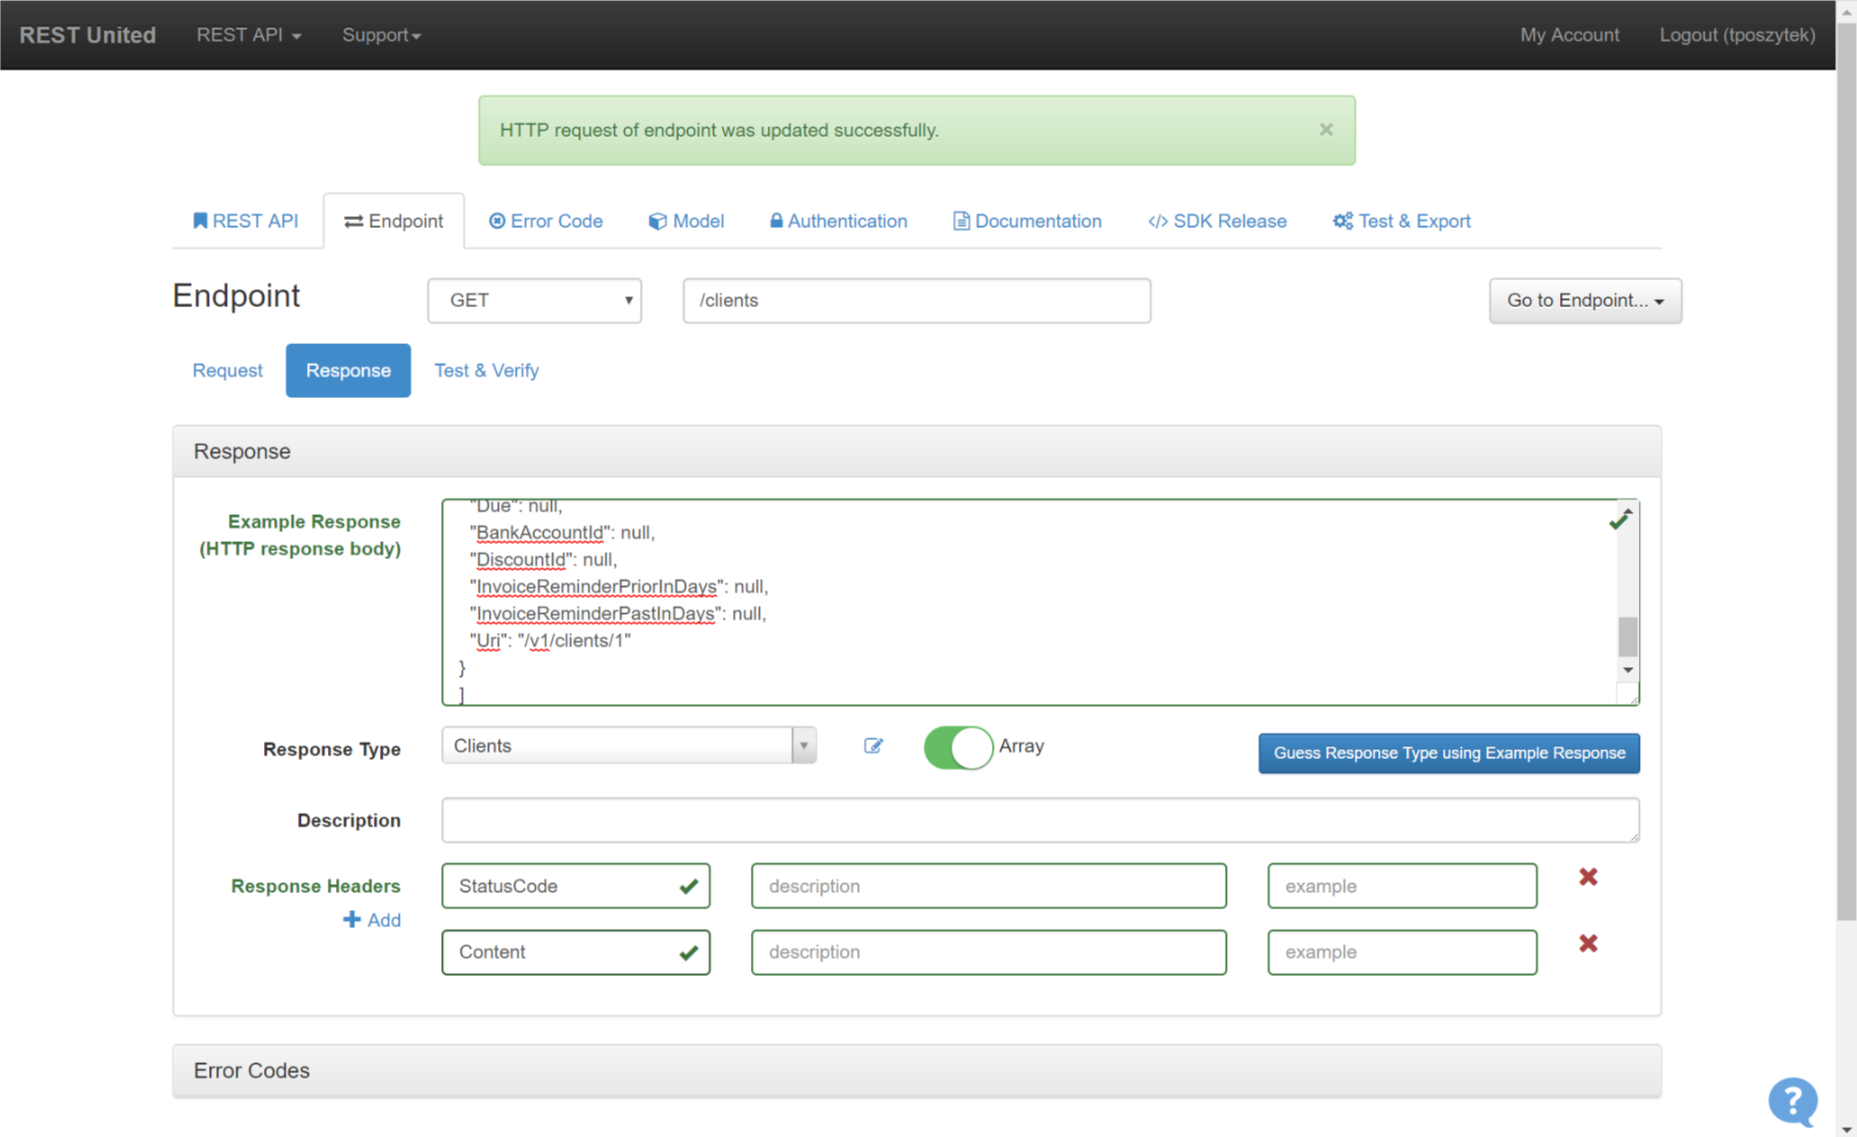 In my case the response contains a JSON object with a collection of all Clients I do have in my database. If you are able to copy-paste the Response example value, REST United will be able to create an object for you. Cool!
Step 4 – Test & Verify
Now you can provide required parameters and test if your REST endpoint is configured properly so that you receive ResponseCode=200 (OK):

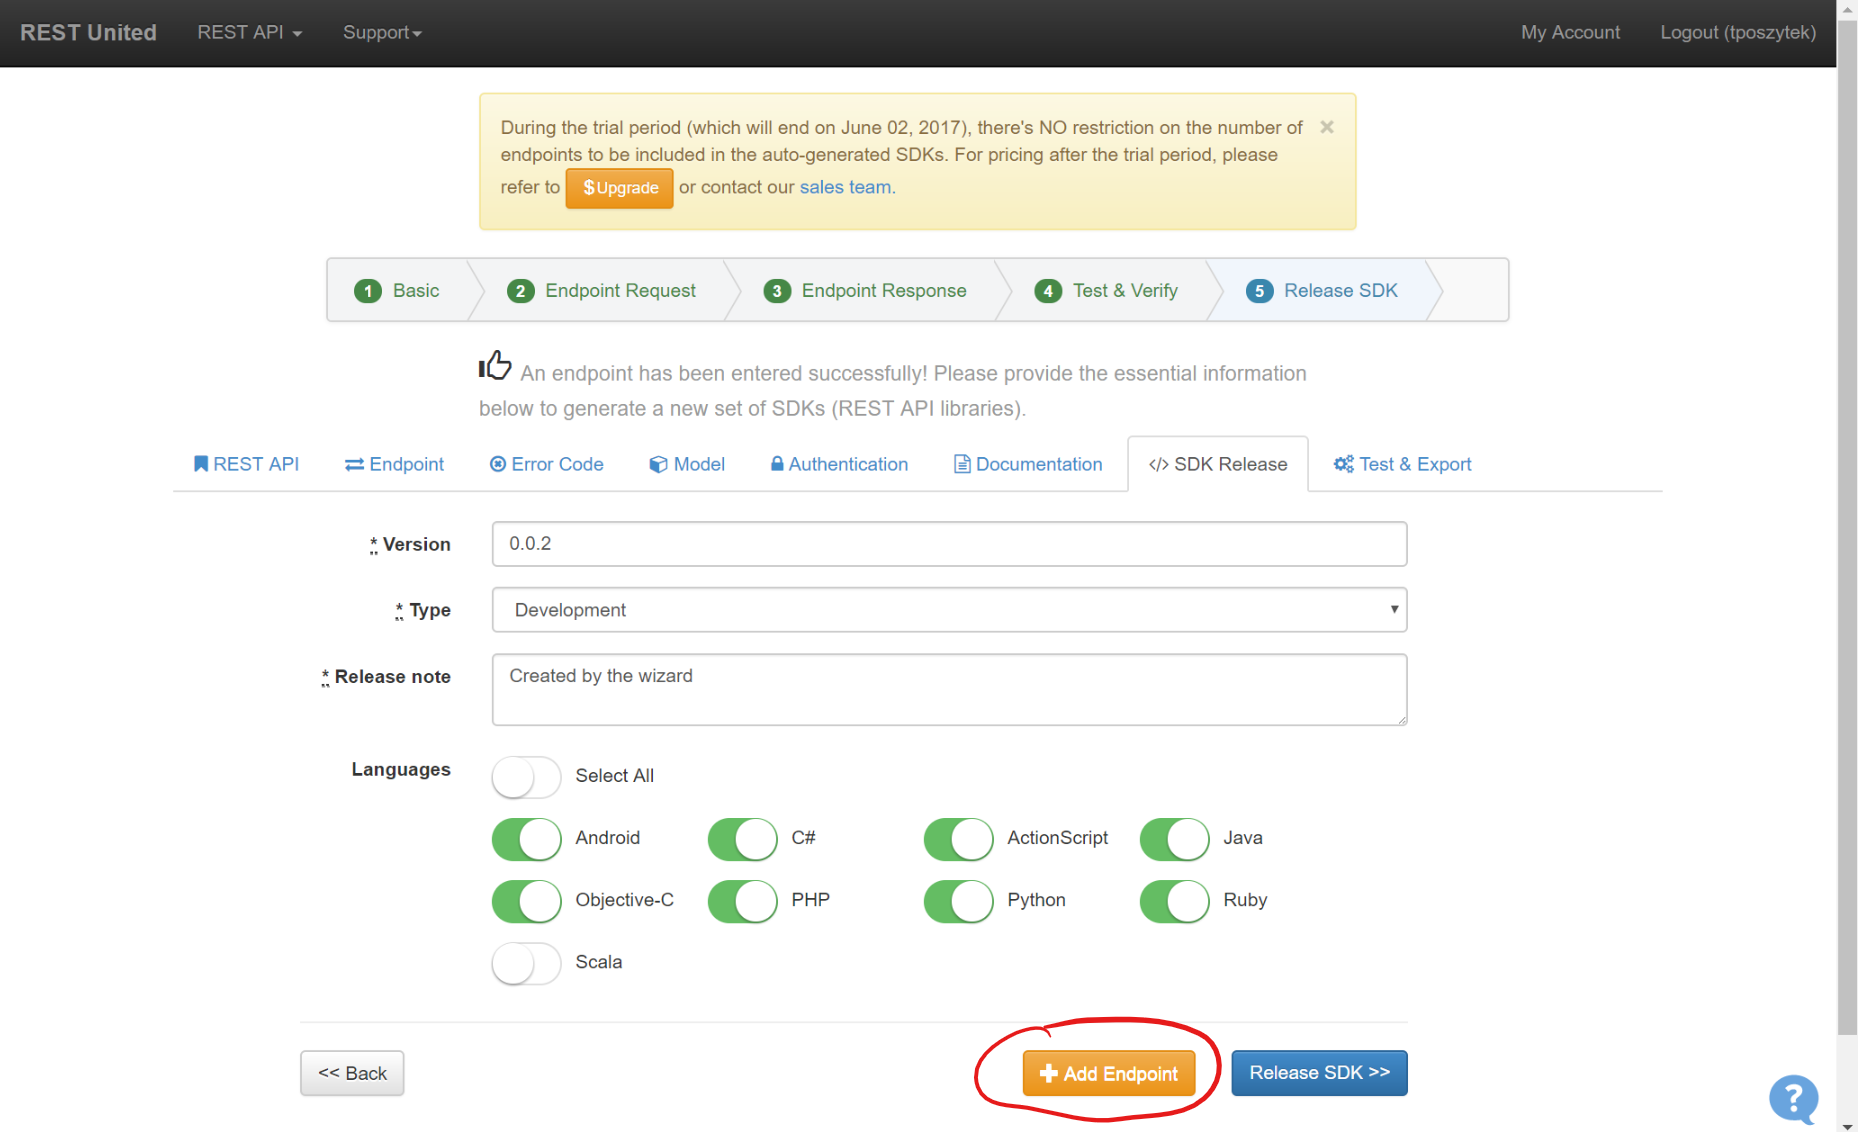
Step 5 – Release SDK
Now you are ready to publish the SDK. If you want to add more endpoints (so that more actions will be created in NWC), simply click “Add Endpoint” orange button. If not, click “Release SDK“:
Step 6 – Obtain Swagger JSON file
When released, REST United starts to build your SDK. Once it is done (Status will be switched to “Succeeded”), go to “Test&Export” tab, and click “Swagger” button, and then “Export”:
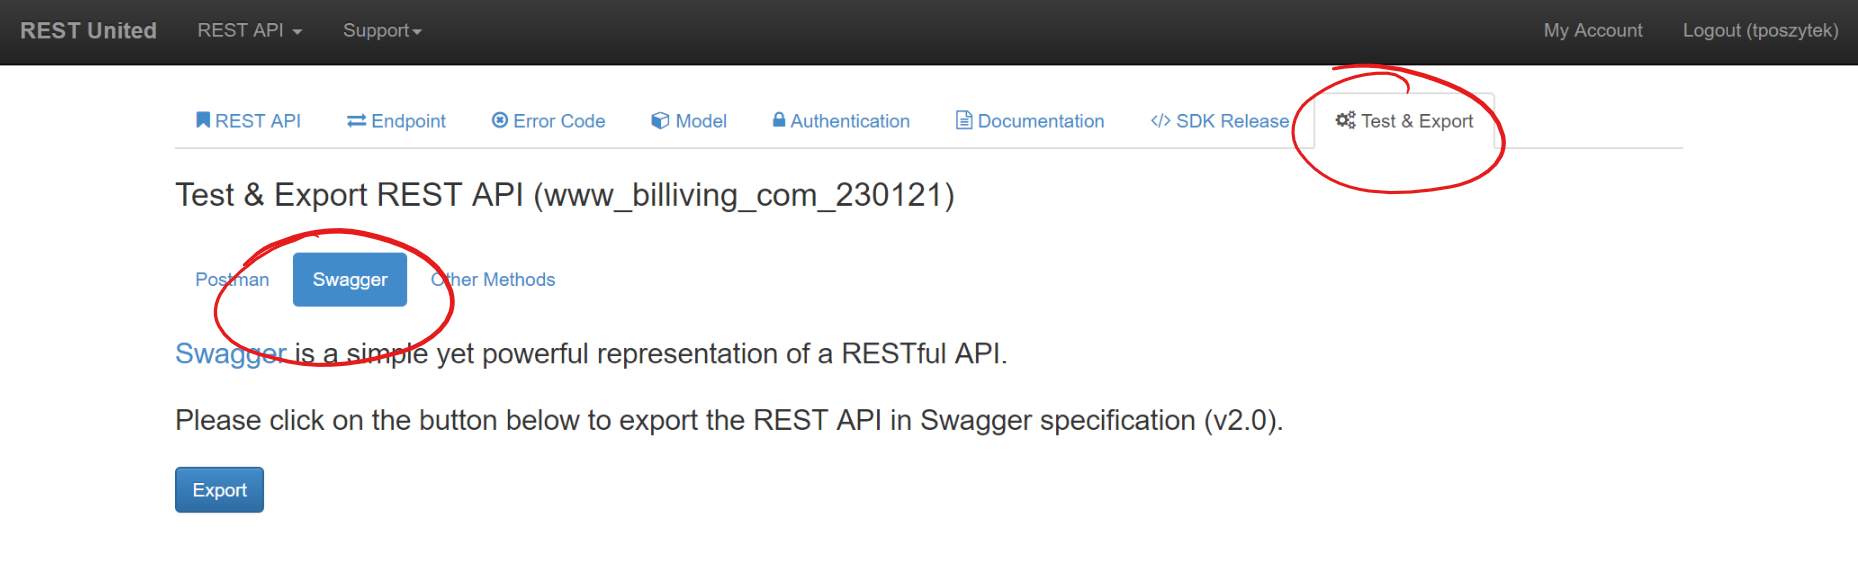
This way you became a proud owner of a JSON Swagger file. Now let’s get back to Nintex Workflow Cloud.
I do have a Swagger file, what do I do now?
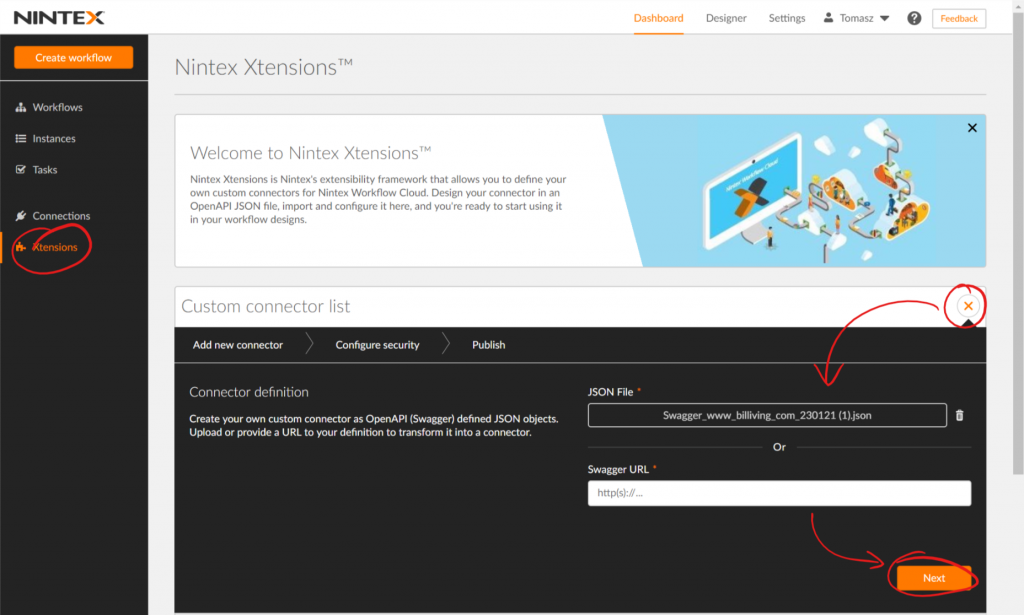
Create Xtension
- Go to the Xtensions menu. Click “+” button and choose the JSON file with a Swagger definition of the endpoints:
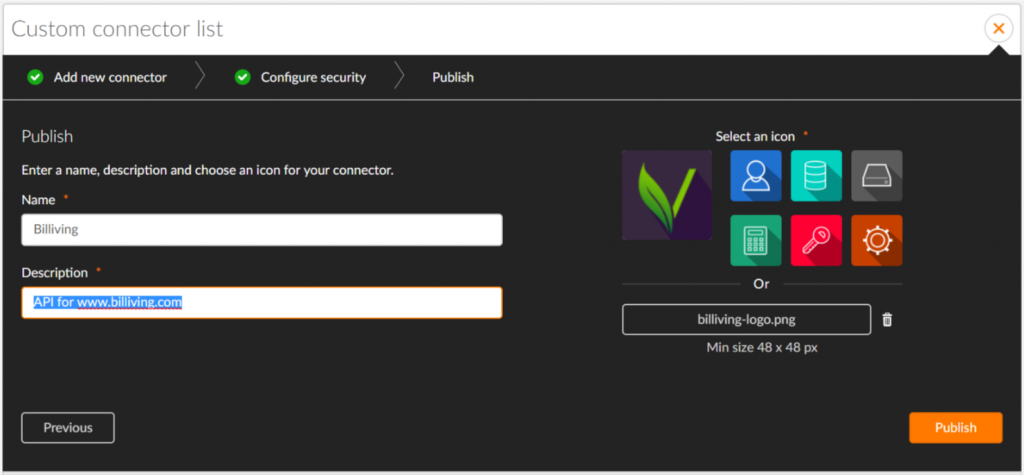
- Confirm authentication method and set name and description, together with a logo:


Create Connection
After a while the Xtensions will be created. Now go to “Connections” – here you need to create new, trusted connection to the endpoints, using defined in Xtensions Authentication method, for your Connector (choose it from the drop down list):

Once the Connection is created, you can start designing your workflow.
Example of usage
I created a workflow, that is triggered by a public form:

The purpose of it is to gather a data from the form, get Country ID for the given country name, and store provided information as a new Client in the Billiving application. The form itself is not very pretty, but Nintex is intensively working on the “Zink“, so in the near future the NWC forms will get prettier.
The workflow uses two methods: “Definitions – Get Countries” and “Client – Create a client“.
Look in the actions pane, how many new actions are present. Each corresponds to a different endpoint I have defined using REST United:
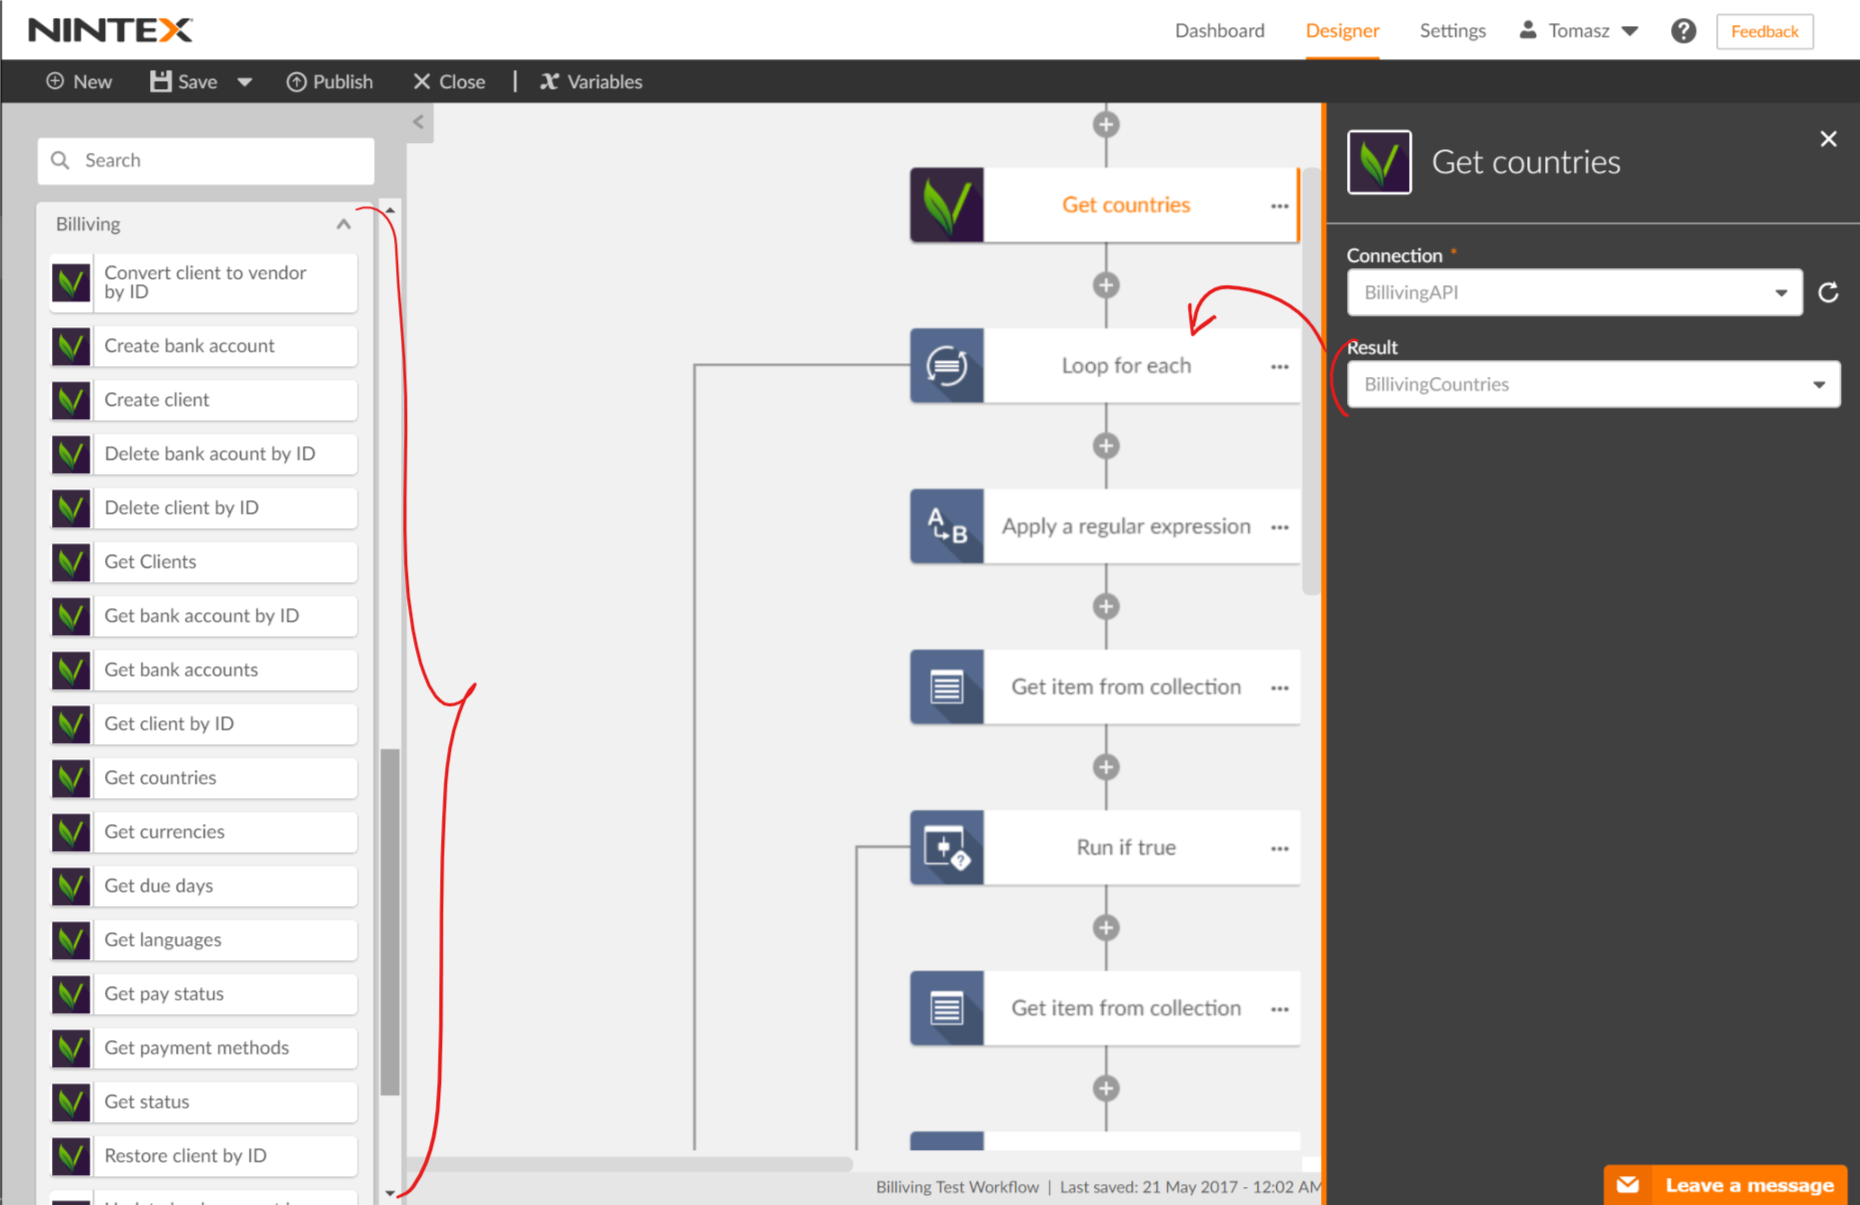
As there is no Collection Operation that would allow me to get the KEY using VALUE I need to iterate through the whole collection of countries, checking if current one is the one provided by a customer. If yes – the loop stops and its ID is saved.
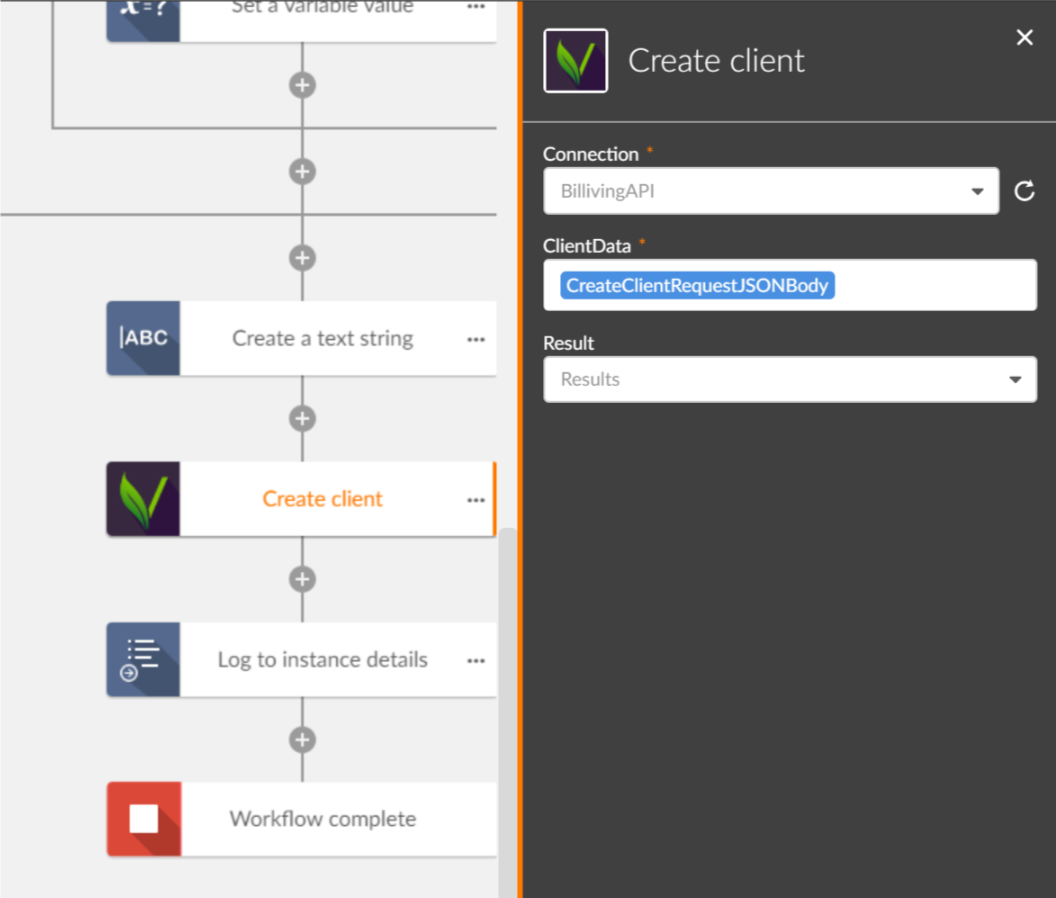
Once I get the data, I create a JSON Request Body and use it in the “Create Client” action:
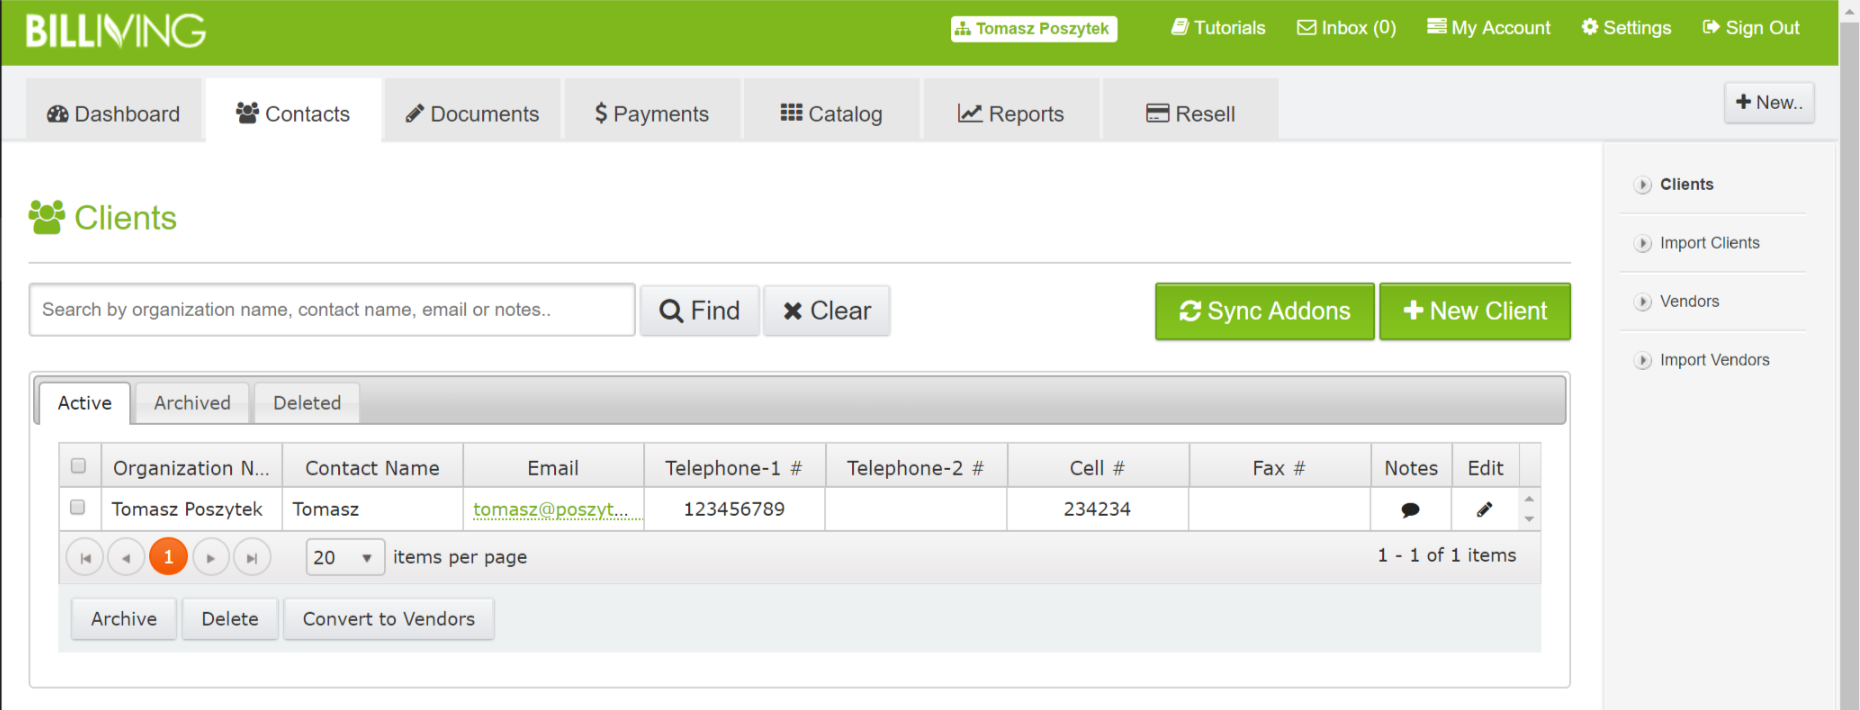
After submitting the form it took around 5 minutes for the workflow to iterate through the collection of countries, but in the end, the Client was added:
I find it as a very powerful functionality, allowing us to really integrate to the Nintex Workflow Cloud almost every modern application, having REST API available. I do not only think about existing web based apps, but this also gives us the possibility to create for ex. very sophisticated apps hosted on Azure, and providing their REST API to communicate with NWC. Very, very useful!