
Adding utterances in LUIS via REST API
Table of contents:
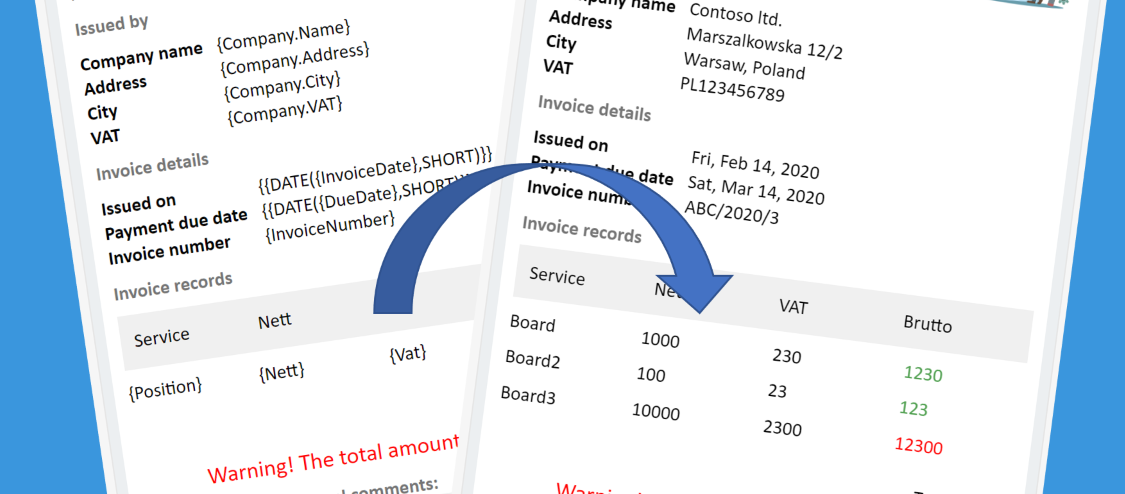
When working with LUIS (Language Understanding Intelligent Service) from Microsoft, the most common scenario is that this is used in business processes. The very important feature of the service is that it can be trained with new utterances. This can be done either manually, via user interface or… using service’s REST API. Let me show you how to do it using Power Automate.
Possibility to update LUIS via Rest API is really important when speaking about automated processes. For example, when a new keyword appears and because it gets accepted by user, it is saved to LUIS and the service is then trained and published. This way it can be automatically updated.
Rest API endpoints
Although LUIS is now available in version 3.0, the authoring endpoints are still available in version 3.0-preview. But, as long as they work, we have no reasons to complain 🙂 To complete the process we workflow needs to call the below endpoints, in that order:
- POST: https://{endpoint}/luis/authoring/v3.0-preview/apps/{appId}/versions/{versionId}/example – to add new utterance to the specific intent (docs);
- POST: https://{endpoint}/luis/authoring/v3.0-preview/apps/{appId}/versions/{versionId}/train – to train the model (docs);
- GET: Now process must call https://{endpoint}/luis/authoring/v3.0-preview/apps/{appId}/versions/{versionId}/train in a loop, as long as status of training for the model is not “Success” (docs);
- POST: https://{endpoint}/luis/authoring/v3.0-preview/apps/{appId}/publish – publish the last version of the model (docs).
Obtain {endpoint} value and other parameters
The easiest way to get all required values, so:
- endpoint
- appId
- versionId
- Ocp-Apim-Subscription-Key
Is to go under “Manage” tab inside LUIS portal:
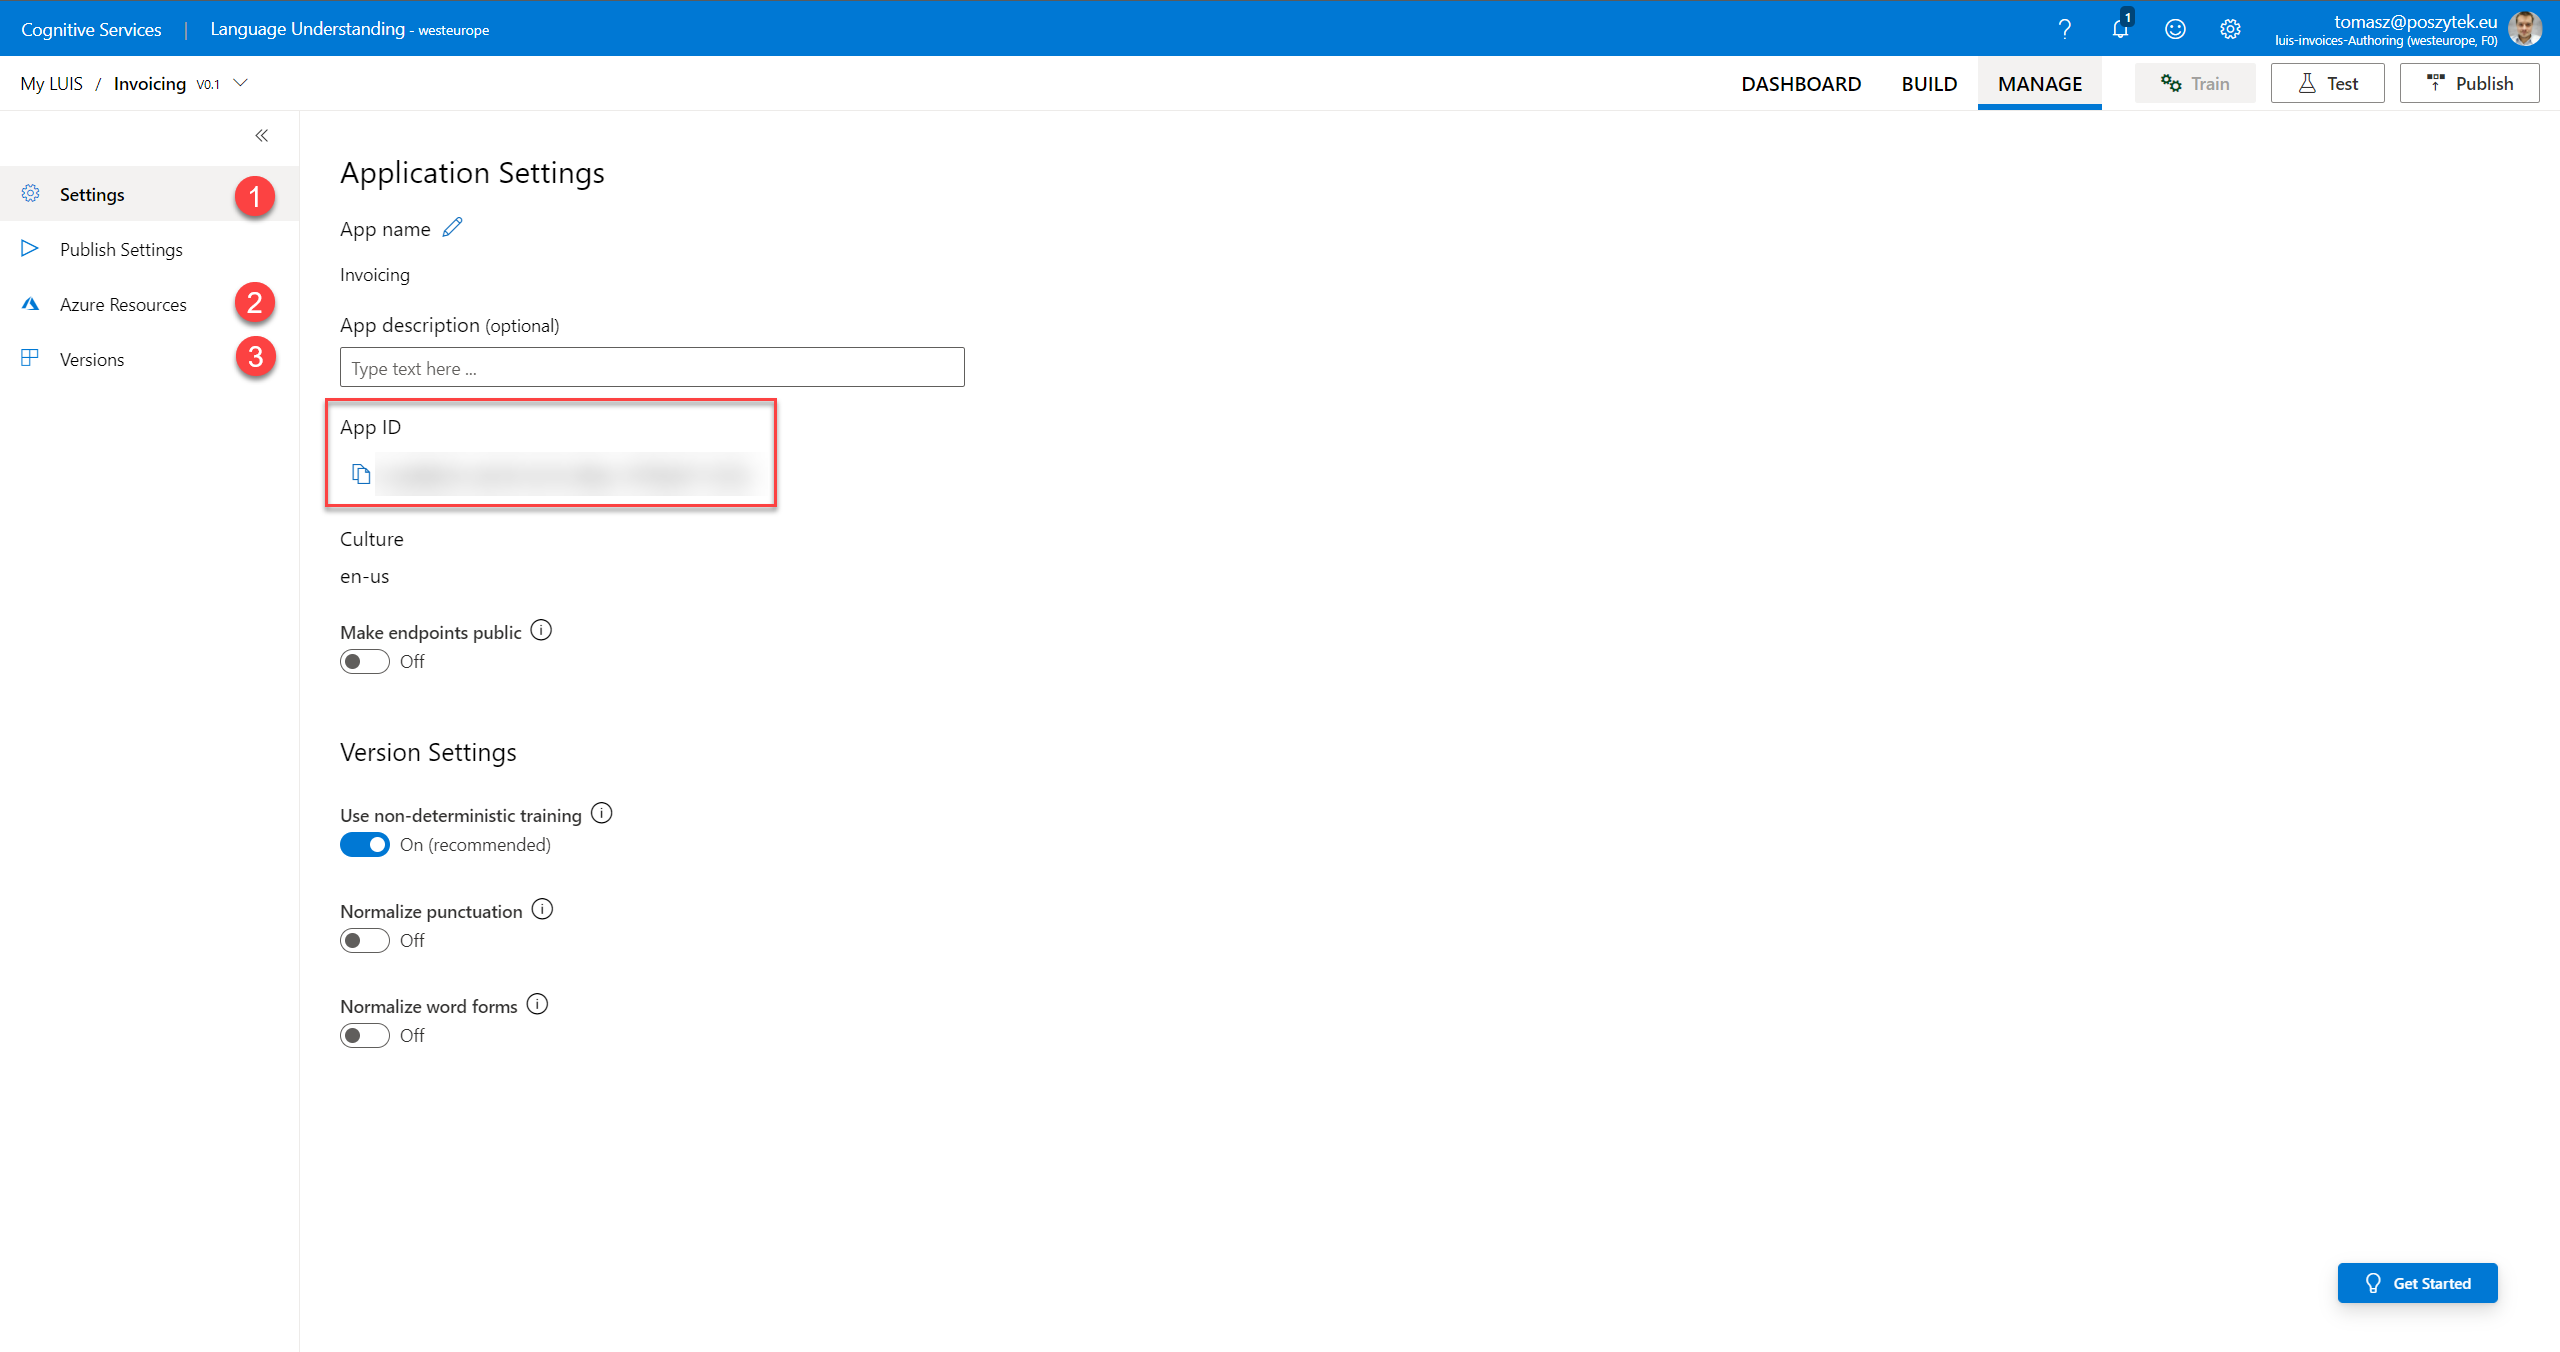
- This is where you can find appId value
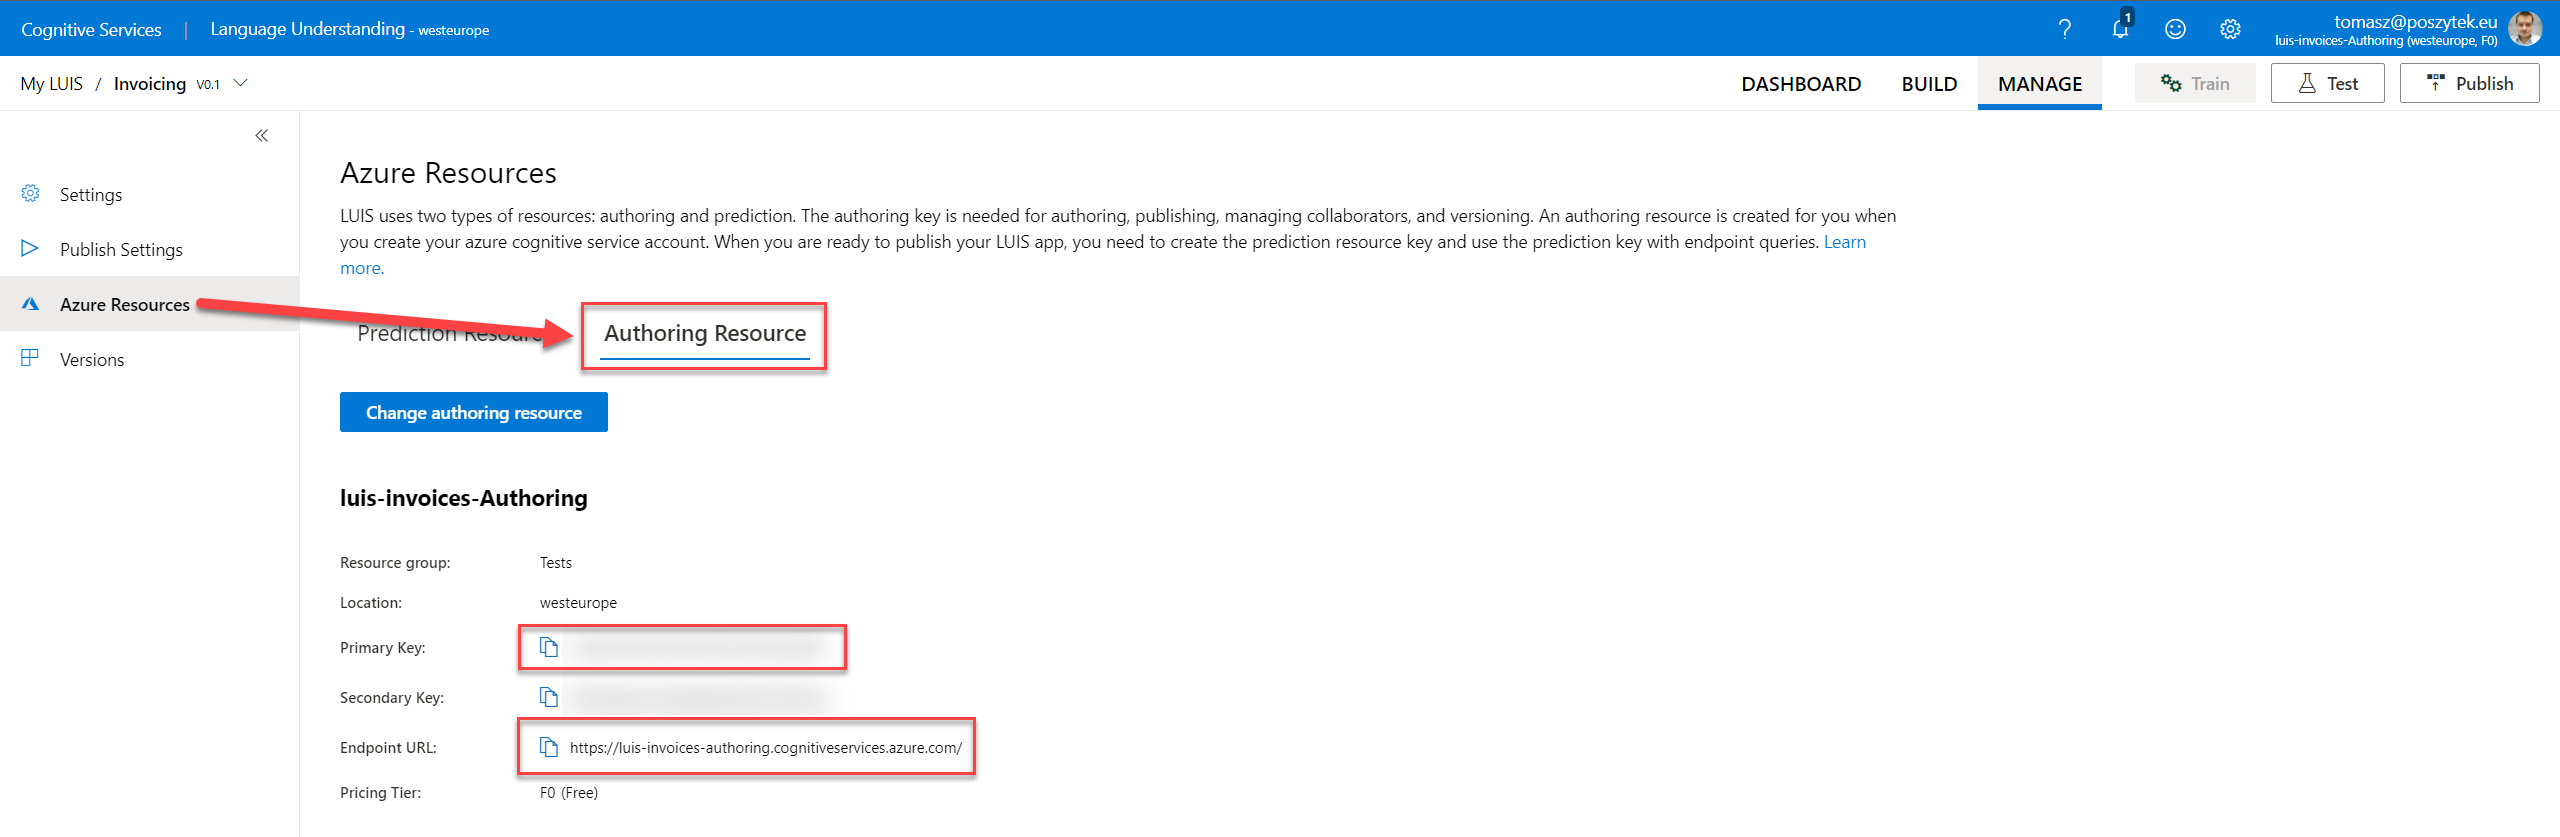
- Here you can find endpoint and Ocp-Apim-Subscription-Key (Primary Key) values – just remember to switch into “Authoring Resource” tab:
- Finally here is where you can find current versionId (usually 1.0)
Implementation in Power Automate
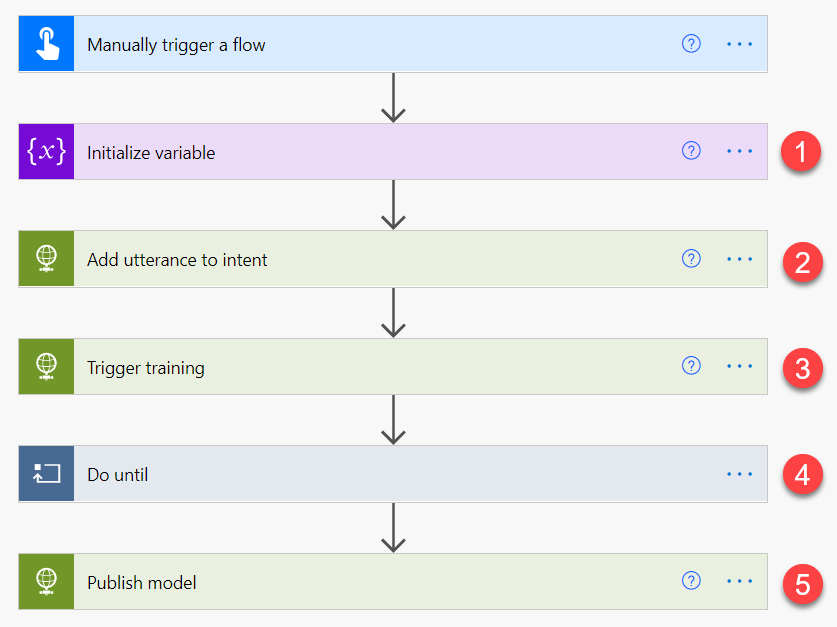
First init variable, that will be used to terminate checking, if training is successful. Use boolean variable and set it’s initial value to “false”.
Next add http call to the fist endpoint, to add new utterance:
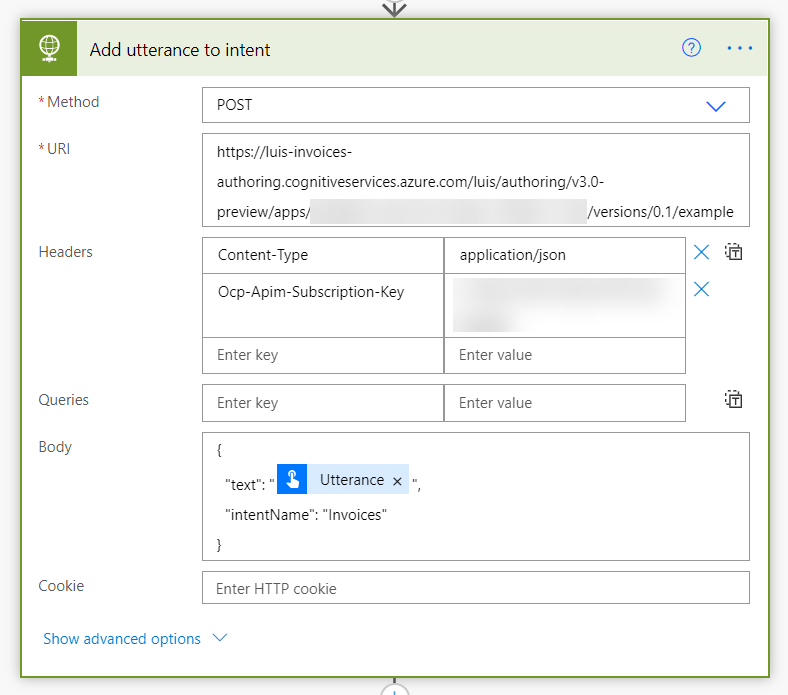
What you can additionally do here, is to apart from only adding the utterance to specific intent, as well mark that piece of text, which contains a specific entity. For that you obviously need to know what entity is that and also what is its starting and ending character. The request would look like below:
{
	"text": "@{triggerBody()['text']}",
	"intentName": "Invoices",
	"entityLabels":
	[
		{
			"entityName": "Invoices::Bill",
			"startCharIndex": 1,
			"endCharIndex": 23
		}
	]
}
The above will not only add utterance, but as well set the text between 1st and 23rd character as a “Bill” entity from “Invoices” list.
Next step – trigger training.
And now the best part comes. In a forever loop check training status. I am checking only the training status of the model built from my intent, therefore I am filtering all returned statuses to check only the desired one:
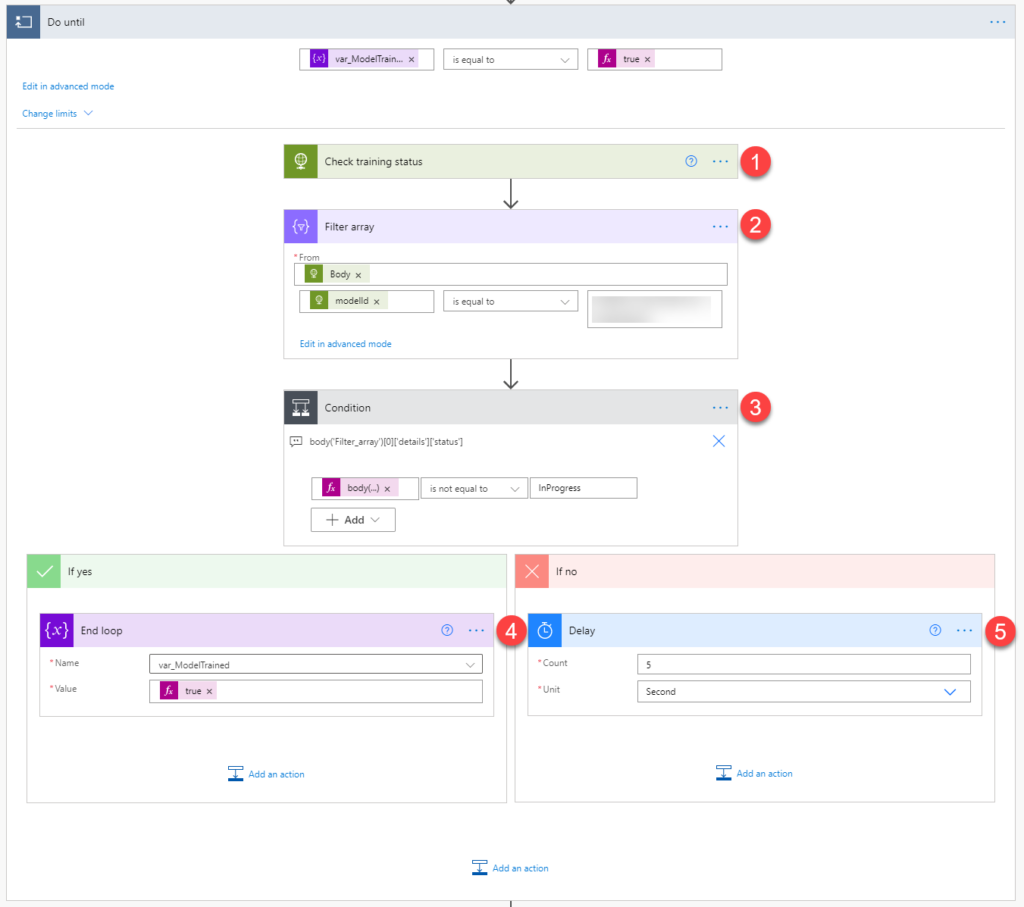
- Sending GET request to check training status of all models in my app;
- Filtering models to leave only the one, for my intent (where I am adding utterance);
- Checking, if status is other than “InProgress”. It can be as well “Success”, “Failed” or “UpToDate”.
- If status in different, then workflow is setting variable to end loop to true.
- Otherwise is waiting 5 seconds before the next check.
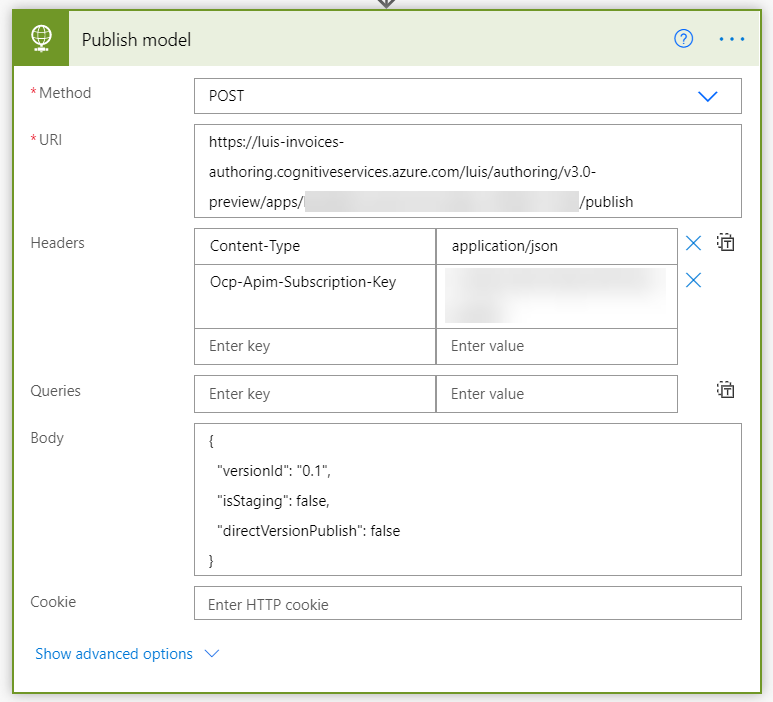
Lastly, send the “Publish” request, so that your latest changes are available:
Wrap up
This is it. The process really is easy, so you can as well easily implement it in your workflows. What can be difficult is setting what entities are present within the utterance. For that I don’t have any automatic solution. I would say, your process should just add new utterances, but the job to mark entities in them should be done by a human agent.
Also, remember this approach I showed you, requires premium license for Power Automate.
Please leave your comments and questions below. Thanks!