

Removing records in SharePoint from PowerApps
Table of contents:
PowerApps is getting more and more powerful tool to create business apps in the “no-code” approach. Using SharePoint as the data source is somehow natural (although there are alternatives, like an SQL Server or Common Data Service) thanks to their tight integration.
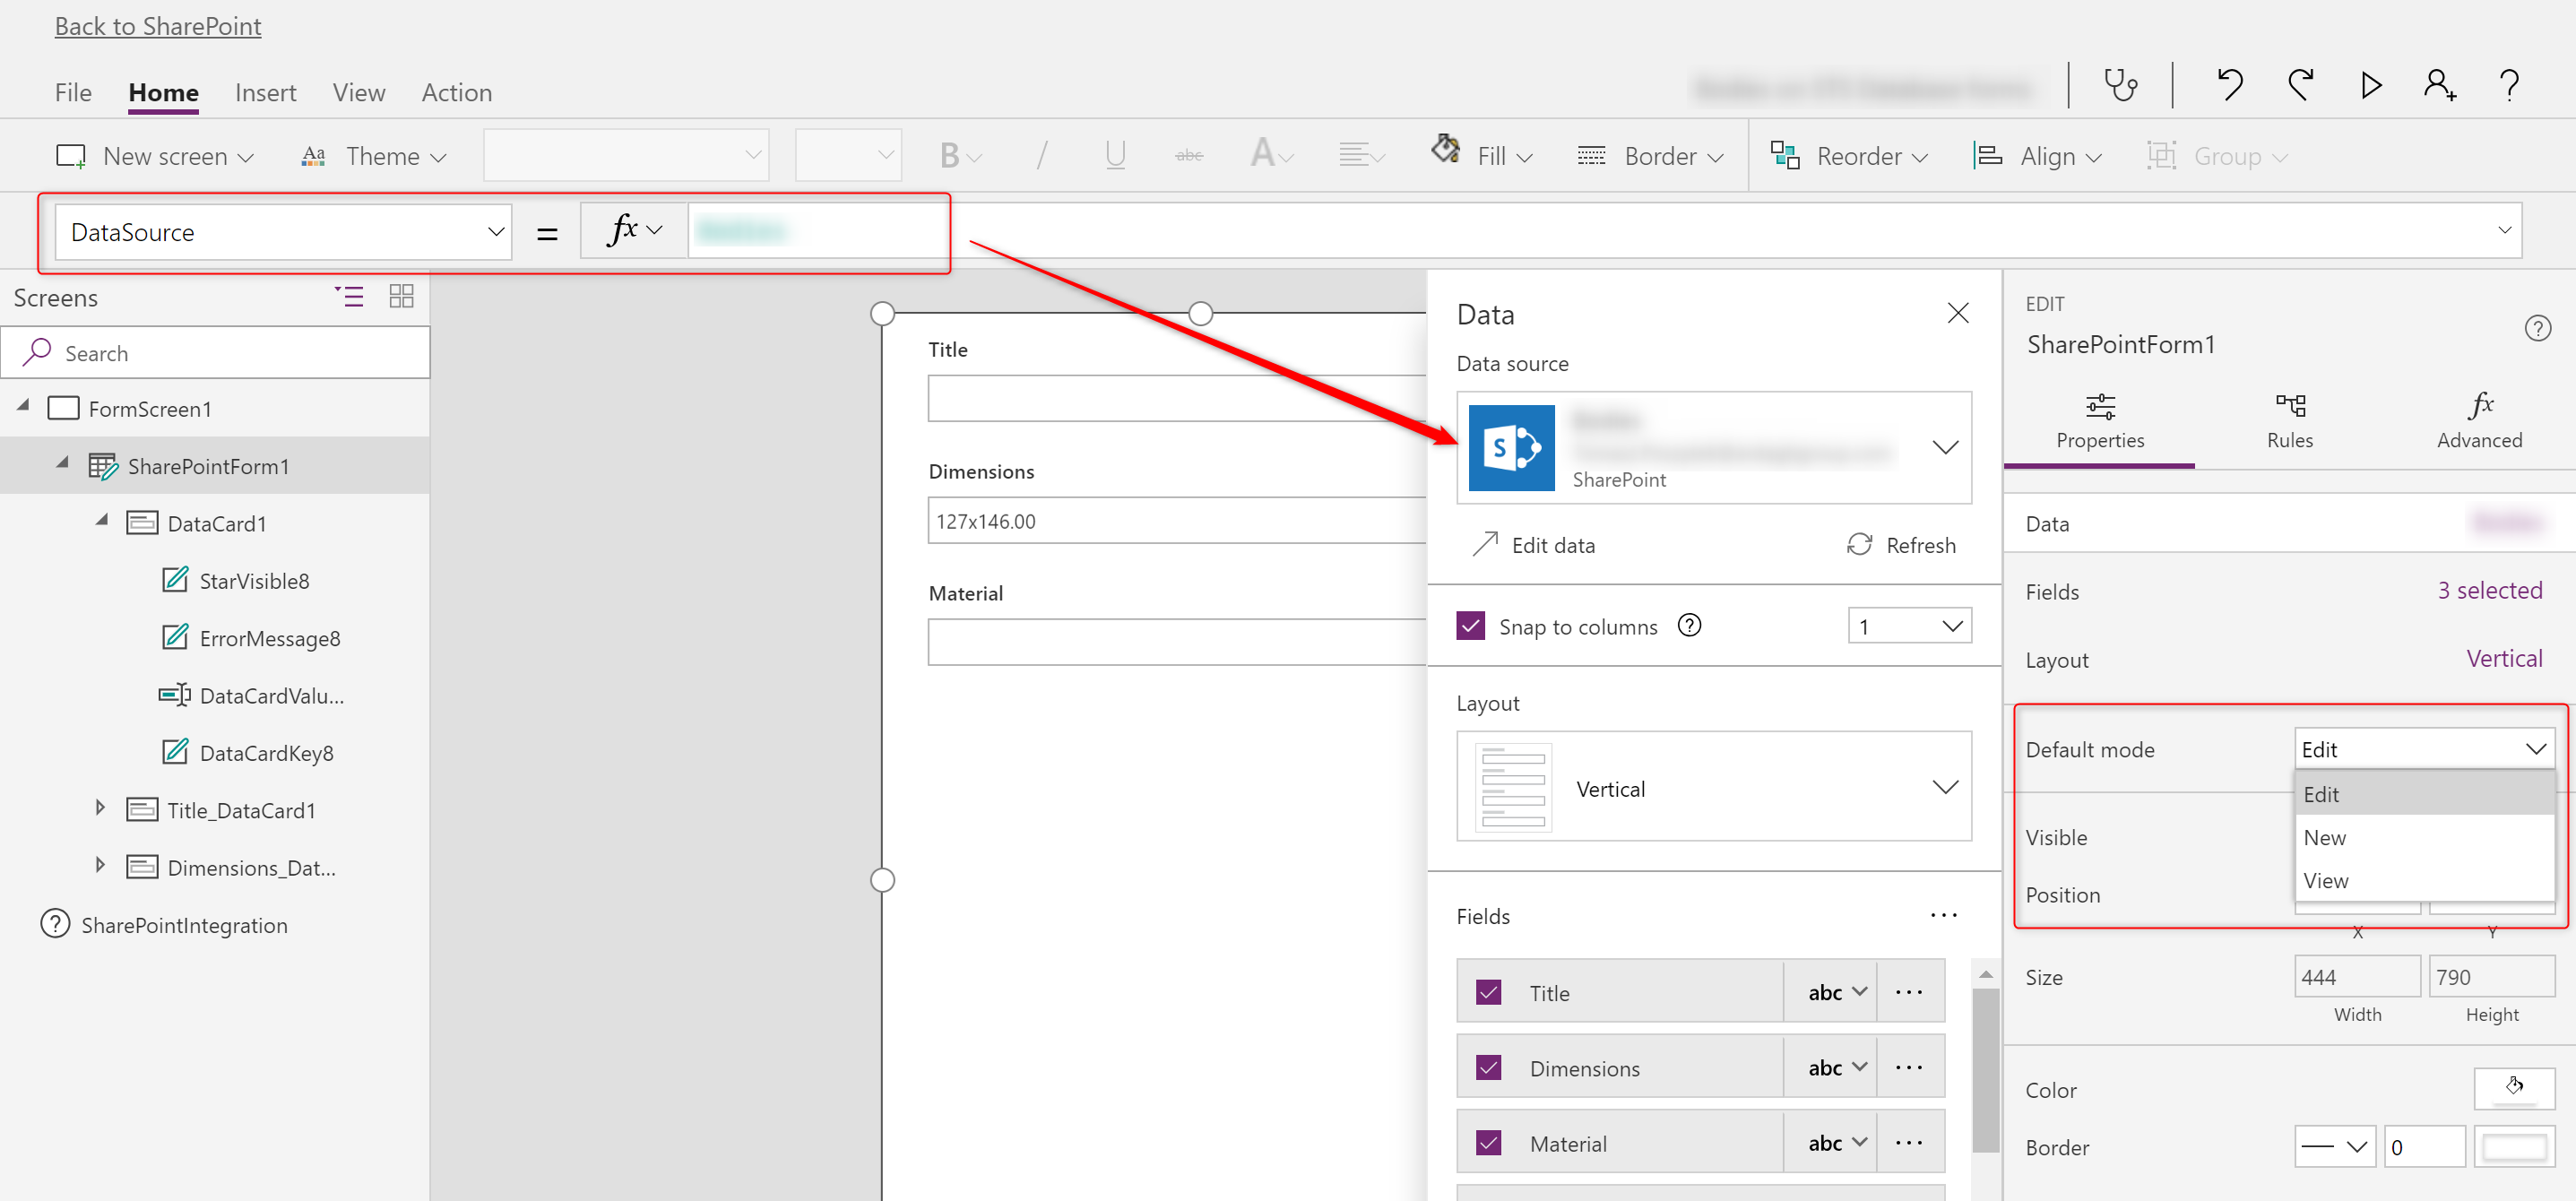
It is very easy to create a new form for SharePoint list using PowerApps functionalities. Forms present in the tool with a single click can be bond with any list and by providing record ID switch them between edit and new mode, as well as view.
When building a business application however it is often very important to also have the option to remove records, not only to add or edit them. There is yet no ootb option in PowerApps present to support this scenario, however with a little help from Microsoft Flow everyone can achieve it.
How to remove records in SharePoint from PowerApps?
Using Microsoft Flow obviously! First think about the logic of your app, regarding how user can access that specific item. For example, use a “Gallery” control or a “Data table”. Once user selects a record transit him to another screen with a form, where the selected record ID is used as the input for the form.
Below a form add buttons, to save and delete the record. Handling save is easy, this comes with the form almost ootb. Simply use the following expression in the “OnSelect”:
SubmitForm(NAME_OF_YOUR_FORM)To handle deleting, use “Action” –> “Flows” and from there create a new Flow. For my purpose I have create a generic flow, able to handle removal from any list within a specific site:
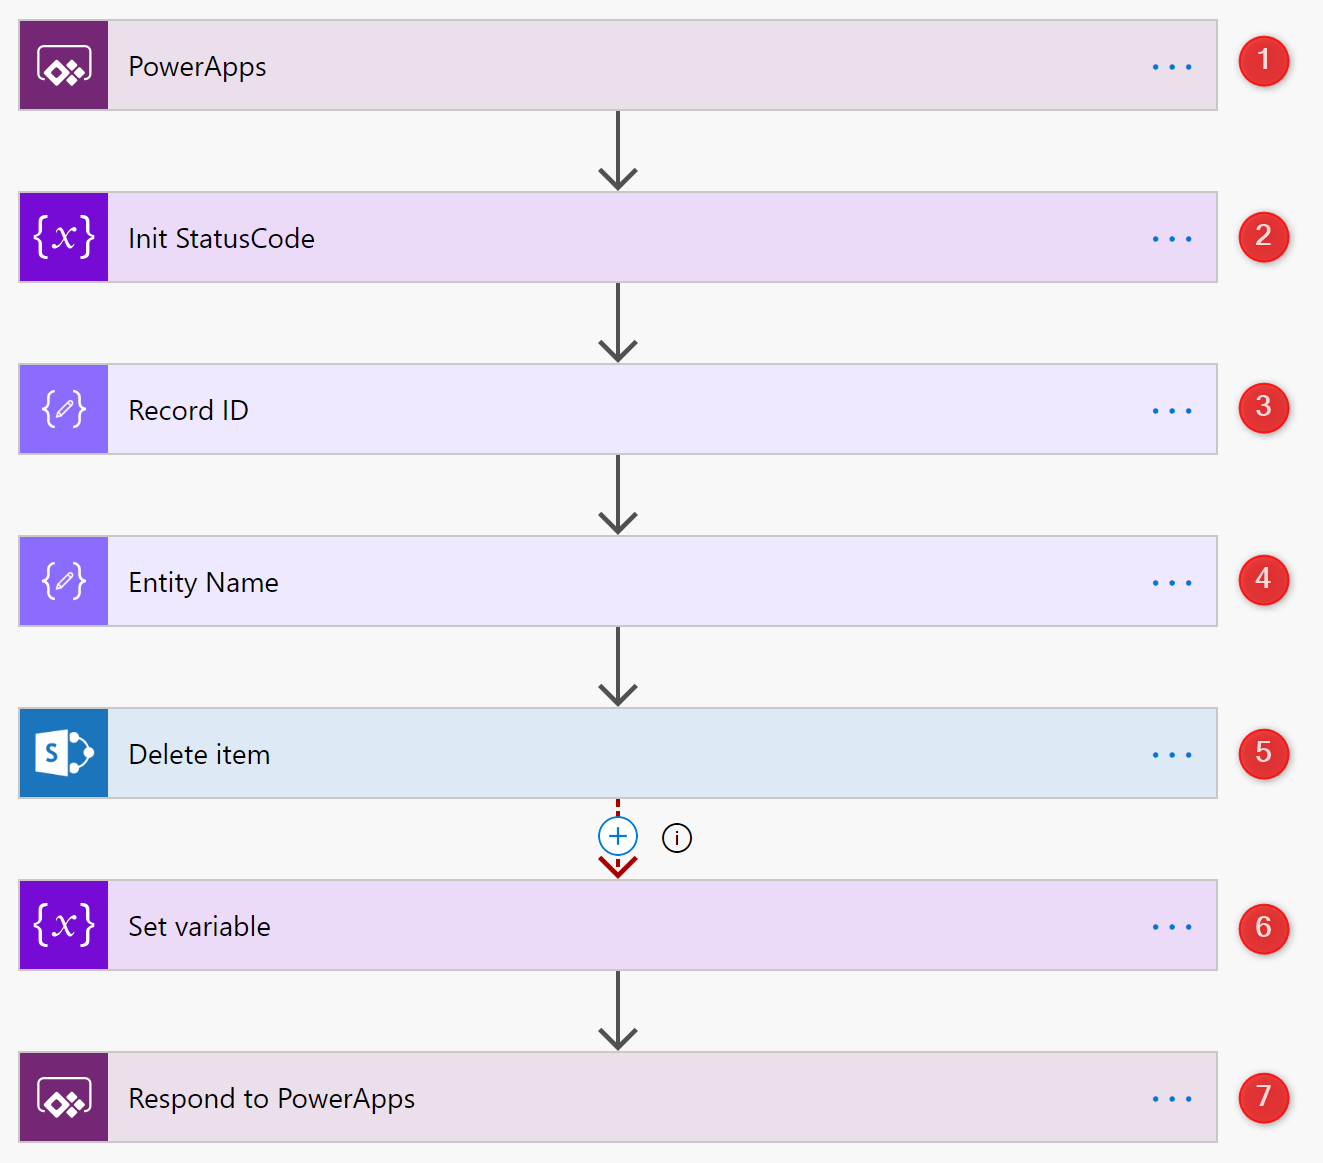
- This is a trigger actions – a request from PowerApps.
- I’m setting initial value of the Status Code, that will be then returned to PowerApps.
- Compose action, to collect ID of the record that is going to be deleted.
- Compose action, to collect name of the list, from which the record is going to be deleted.
- The actual “Delete” action. It takes ID and Entity name as the “Custom value” parameters:
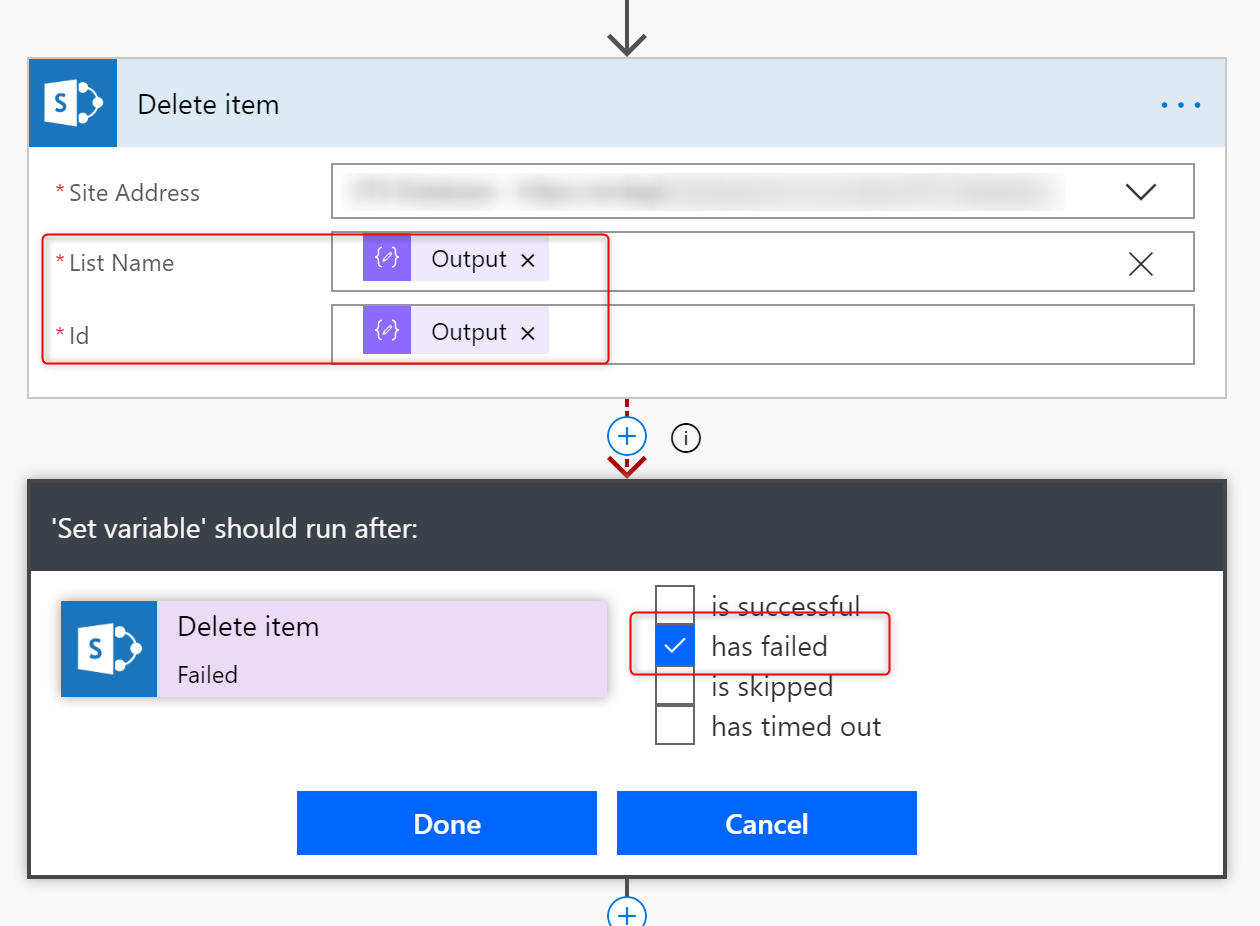
6. Setting variable is only done, if the action 5 ends up with any sort of failure. This action has the “Run after” configured, to start only if the deleting fails.
7. After deleting is done, a status code (either 200 or 409) is returned back to PowerApps (this is quite new functionality, since April 2018, https://flow.microsoft.com/en-us/blog/return-data-to-powerapps/).
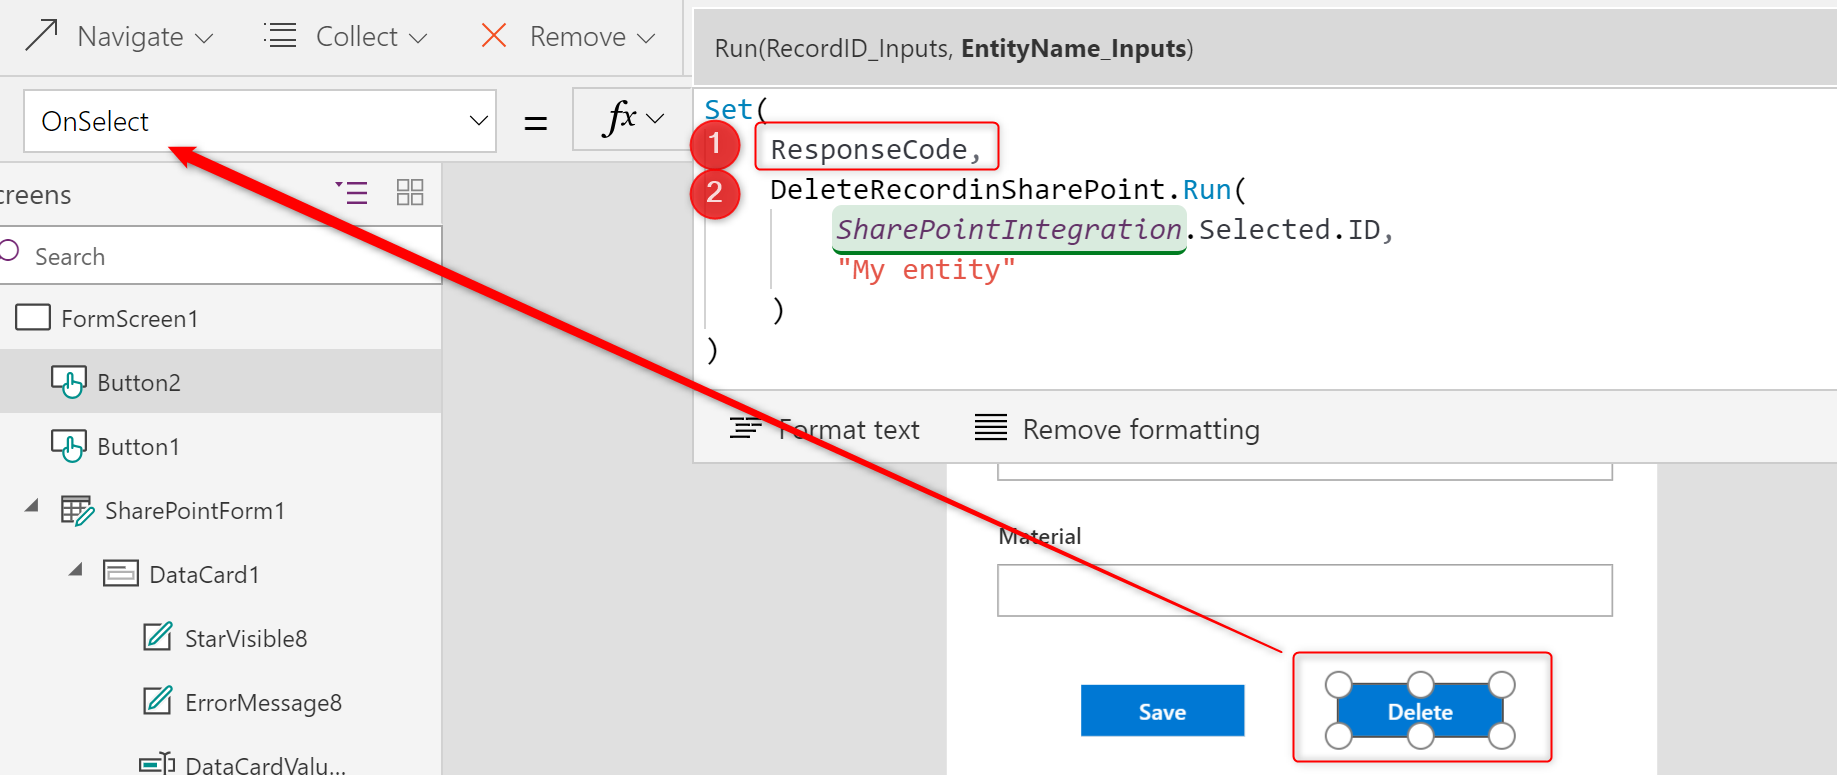
- Name of the variable, that stores response from Flow.
- Flow name and parameters run on button’s “OnSelect” action.
Next steps
After response is collected you can handle it. Eg. create a hidden panel with a message, that is only shown if the response is different than 200 and the other one, when it is equal:
Set(
    ResponseCode,
    DeleteRecordinSharePoint.Run(
        SharePointIntegration.Selected.ID,
        "My entity"
    )
);
If(
    Value(ResponseCode.status) <> 200,
    SHOW_ERROR_HIDDEN_PANEL,
    SHOW_SUCCESS_HIDDEN_PANEL
)
Like what you’re reading? Leave a comment!