Access SharePoint API with application account – my ultimate guide
Table of contents:
I have been struggling with this topic for some time. Almost every time, when I was supposed to work with SharePoint API in Power Apps or Logic Apps, I was googling and going through the same partial solutions.
Just to find out in the end, that it is missing some crucial pieces or that despite all, it doesn’t work. This is why I decided to write this post to help myself in the future and maybe you as well! Let’s get started. For the solution I am going to use Azure Key Vault to store important secrets.
Step 1 – generate new self-signed certificate in Azure Key Vault
When in Azure Key Vault, navigate to Certificates and click “Generate/Import” button:
Next, give it a name you will remember, and under subject type: CN=sharepoint.com. You can set additional options per your needs:
Once a certificate is “Completed”, click on its name:
Then on the latest, aka current version:
And from there click on “Download in CER format”. Save it somewhere, and we will get back to it 😉
Next navigate to “Access configuration” of the Key Vault, and switch the permission model to use Azire role-based access control (RBAC) – it will be important later:

Step 2 – register application in Azure Entra ID
Now, navigate to Entra ID and register new application:
Give it a name and select the “Accounts in this organizational directory only” option. Then hit register. Once the app is registered, navigate to “Certificate & secrets” page:
Switch to “Certificates” area and click “Upload certificate”:
Select the *.cer file you have downloaded in the last action from step no. 1. Give it a description. Click “Add”:
Step 3 – grant api permissions
Now you need to define what permissions the app is going to have. Navigate to API permissions and click “+ Add permission”:
As this post is about SharePoint access, I will focus on granting the app application permissions to access SharePoint. So from APIs, select SharePoint:
Next “Application permissions”, and then depending on what your app will need to do. If just read – grant it Sites.Read.All, if more – up to. I grant my app Sites.FullControll.All:
Once you have granted these permissions, you will need to grant admin consent on behalf of the whole organisation. If you have sufficient permissions – good for you. If not, you need to find the right admin to grant that:
After the consent is granted:
Step 4 – create logic app
Now create a new Logic App. Select whichever hosting option suits your needs the best. Then grant its name and select region. Remember, that the region is THE SAME AS THE AZURE KEY VAULT. Once a new Logic App is created, go to the resource. Expand “Settings” and navigate to “Identity”. Switch the status to “On” (and Save):
Wait a while, then click “Azure role assignments” button:
Next click the “Add role assignment” button, next set the below values:
- Scope – Key Vault
- Subscription – the one under which you have created the key vault from step no. 1
- Resource – Azure Key Vault you created.
- Role – Key Vault Certificate User
And click Save.
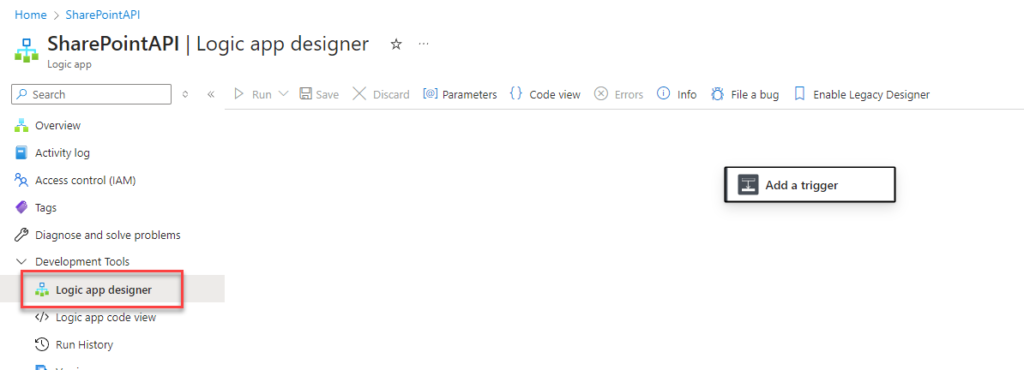
Navigate back to the logic app details. And switch to the Designer! Let’s build the process! 🙂

Step 5 – build the process
After placing a trigger action, add the “Get secret” action from Azure Key Vault set of actions. Then, configure the connection. Under “Authentication Type” select “Managed identity”:
And then name the connection, and type in the name of the Key Vault from Step no. 1 😉 Next, select the certificate you created in Step no. 1:
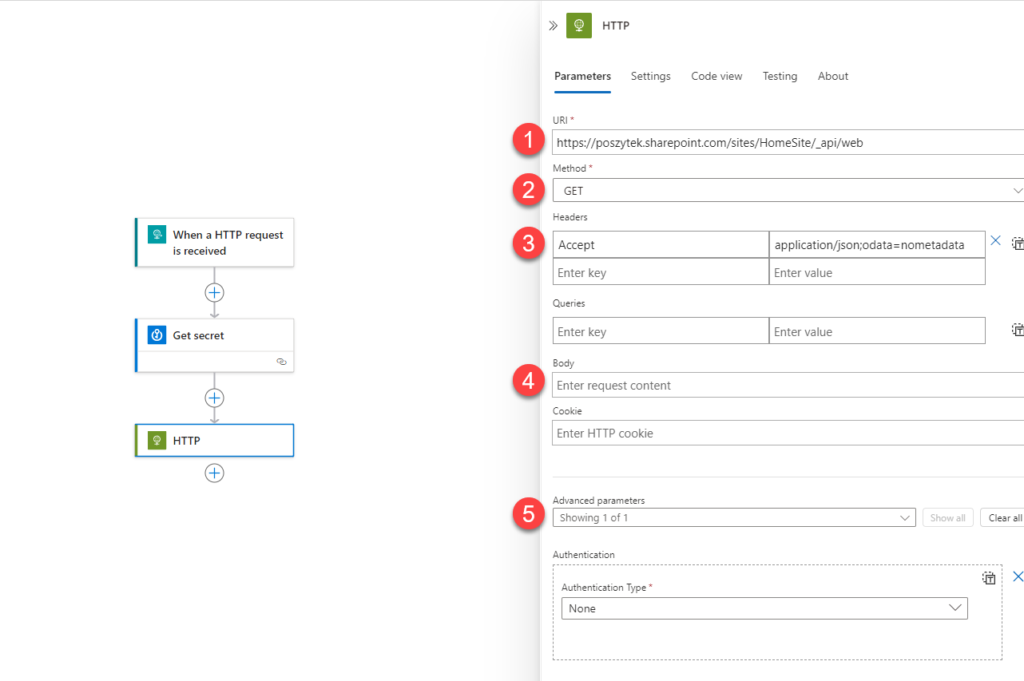
Now, add the “HTTP” action, and configure it as below:
- URI – this is the site URL and the SharePoint API endpoint + any odata parameters.
- Method – depending on the method
- Headers – again, depending on the method. For GET, you need just Accept header. For POST, as well the Content-Type and so on…
- Body – sometimes when doing POST requests, this is where you put request body.
- Advanced parameters – select Authentication.

- Authentication – select Active Directory OAuth.
- Tenant – GUID representing Tenant ID. You can get it from the “Overview” page in Azure Entra ID:
- Audience – your SharePoint URL, e.g., https://poszytek.sharepoint.com.
- Client ID – ID of the app registered in Step no. 2. You can get the value from “Overview” page of the registered app:

- Credential Type – switch to Certificate
- Pfx – Value from the “Get secret” action
Step 6 – tests!
Having these all steps completed, it is now time to save your Logic App and test it. Click “Save”, then refresh the designer, and click “Run”! And voilà! Congratulations! You made it work! 🙂


M
Why use Certificate over Managed identity?
Tomasz Poszytek
As an alternative and as well it’s easier to setup. Why would you go for a managed identity?