Access Graph API with application account – my ultimate guide
Table of contents:
The Microsoft Graph API is just another, extremely useful API, that can be used in variety of automations within the whole Microsoft 365 ecosystem. I am quite often using it with Logic Apps processes, that are running on application permissions.
Recently I wrote a blog post about accessing SharePoint API from Logic Apps. The steps to access Graph API are very similar. Here I am again using Azure Key Vault to store secrets and ids. Ready? So let’s get started!
Step 1 – register new application in Azure Entra ID
First, you need to register the app. To do that, navigate to “App registration”, and from there click “+ New registration”:
Next name your app. Under “Supported account types” select “Accounts in this organizational directory only”. And hit “Register” button. App is created.
Step 2 – grant app required AP permissions
Navigate to API permissions. Click “+ Add a permission”:
Select the big button “Microsoft Graph”:
And later “Application permissions”. Then, choose what permissions you would like to grant the application. Let’s say, I’d like to build an app that can access users’ mailboxes. For that I will need to grant it at least the Mail.ReadBasic.All permissions:
Select the permissions your app will need and click “Add permissions” button. Lastly, click the “Grant admin consent for …” option. If you don’t have sufficient permissions, you will need to find the right admin. If you do have – lucky you! Setting up API permissions is done:

Step 3 – generate secrets
Navigate to “Certificate & secrets” and click “+ New client secret”:
Give it a name and a desired expiration time. After that, copy the secret value! You will need it in a moment:
Also, switch back to the “Overview” of your app. Copy the Application ID and Directory ID. You will also need them in a moment:
Step 4 – store secrets in Azure Key Vault
Navigate to Azure Key Vault. Remember, it must be in the same region, as the Logic App you are about to create. Or the other way round 😉 Inside of the Key Vault, navigate to Secrets. Then click “+ Generate/Import”:
You need to create two secrets. One for Application (Client) ID, the second one for Client Secret. Name these secrets the way you want and paste correct values, you copied in previous step, to “Secret value” fields.
Lastly, switch to “Access configuration” and be sure, your Key Vault is using Azure role-based access control (RBAC) permission model. If not, change it:
Step 5 – setup Logic App
Create new Logic App. Select the hosting option that suits your needs the best. Then give your Logic App a name and remember – create it in the same region as your Azure Key Valut.
Once your resource is provisioned, click the “Go to resource” button. In there, open the “Identity” page. And switch status to “On”:
Shortly after, click the “Azure role assignments” button below:
Next click the “+ Add role assignment” button, then set up the options:
- Scope – Key Vault
- Subscription – the same as you Key Vault is using
- Resource – the Key Vault
- Role – Key Vault Secrets User

And click “Save”. Navigate back to the app.
Step 6 – design Logic App
Now this is a time to build the process! Navigate to the Logic app designer. Define a trigger you need.
Now add “Get secret” action from Azure Key Vault set of actions. Set up new connection (if you haven’t done it before):
- Connection Name – define suitable for you,
- Authentication Type – Managed identity,
- Vault Name – the name of the Azure Key Vault.
If you have set up all correctly, after a connection is created, you should be able to list all the secrets present in the vault:
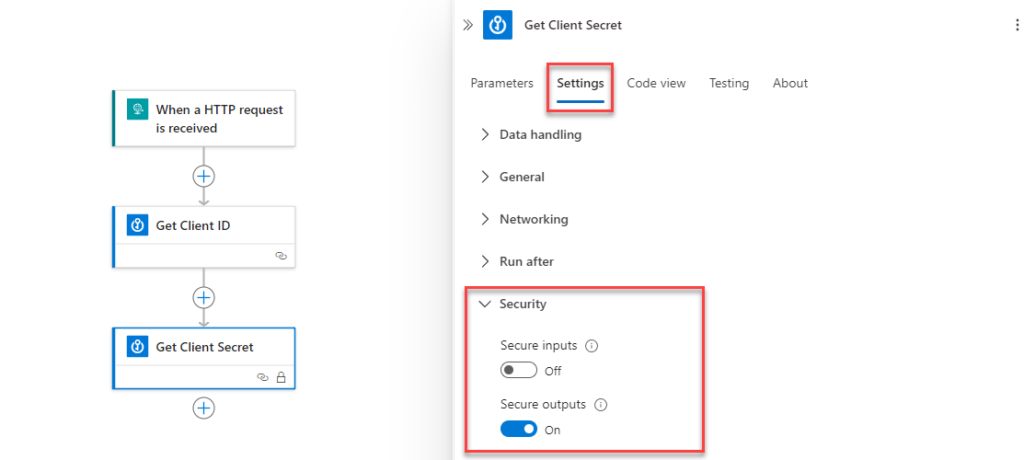
Create one action for Client ID, second for Client Secret. What you can also do, to secure your data, is to switch into “Settings” of the action, and select “Secure outputs” option, to avoid secrets from being available in runs history:
Next, you need to obtain access token to make calls to Graph API. To do that, add HTTP action, and configure it accordingly:
- URI – this will be
https://login.microsoftonline.com/{Directory ID from Step no. 3}/oauth2/v2.0/token - Method – POST
- Headers – just one:
{"Content-Type": "application/x-www-form-urlencoded"} - Body –
client_id={VALUE FROM GET CLIENT ID ACTION}&client_secret={VALUE FROM GET CLIENT SECRET ACTION}&scope=https%3A%2F%2Fgraph.microsoft.com%2F.default&grant_type=client_credentials
And last one – add another HTTP action, that will make the actual call to Graph API:
- URI – the endpoint you are about to call,
- Method – depending on the endpoint,
- Headers – again, depending on the endpoint, but most importantly, add the Authorization header:
{"Authorization": "Bearer @{body('Get_access_token')?['access_token']}"} - Body – depending on the endpoint.
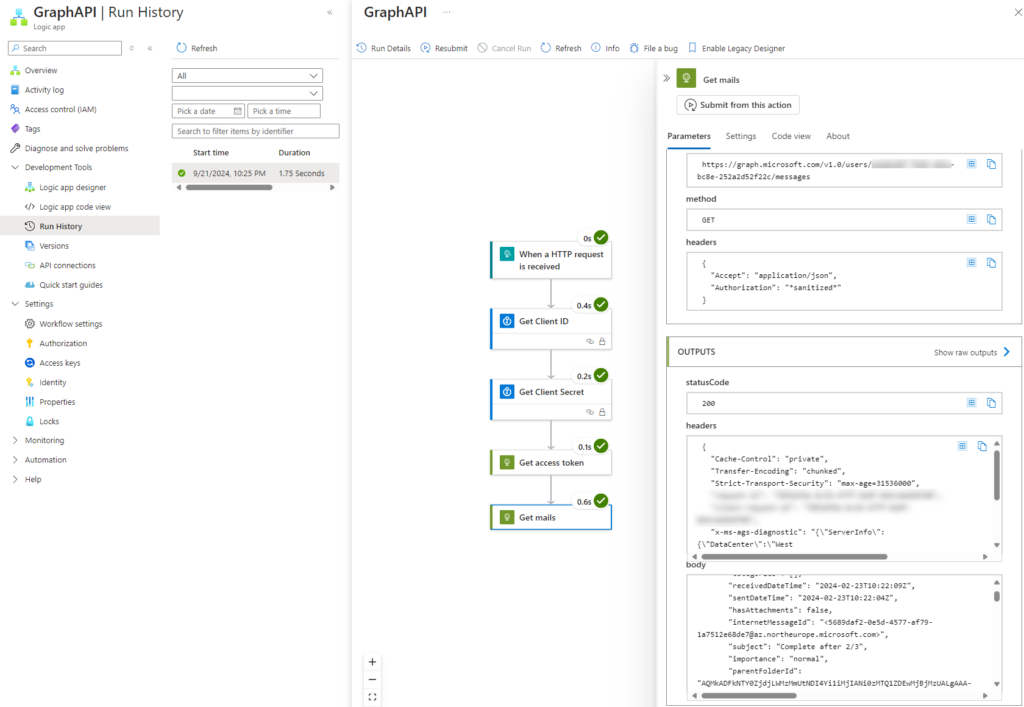
Save your process. Re-open the designer and click “Run”. Congratulations! You just made your Logic App that works with Graph API using application permissions! 🙂


