
Elevated permissions in Power Automate
Table of contents:
It was fairly easy to say to SharePoint Workflow (both in 2010 and 2013 versions) that certain action or actions should be executed with the elevated permissions.
That was a handful solution every time we wanted users to be able to update an item during the process, to which they don’t have write access directly.
How was it done in SharePoint 2010 and 2103 Workflows?
It was fairly easy. Once in a designer you simply had to click on the icon “Impersonation Step” (SP 2010):

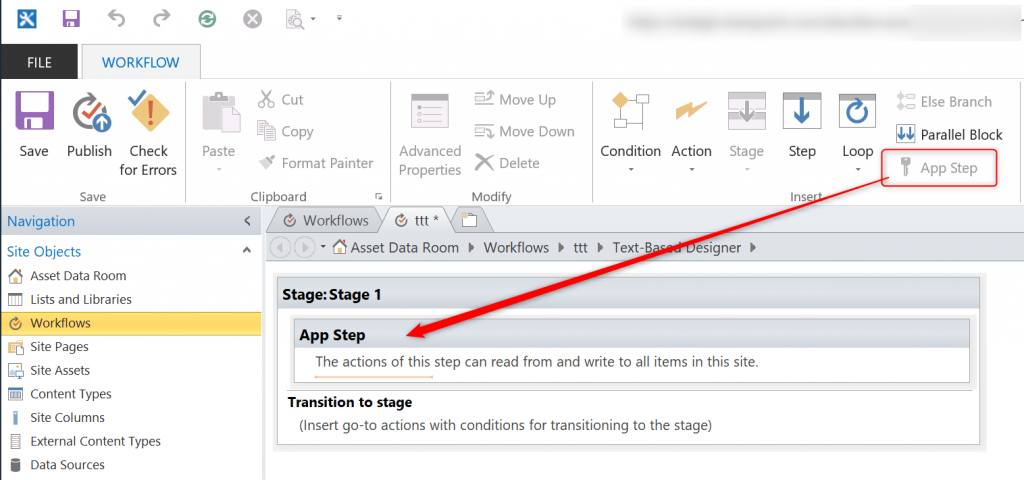
If you were lucky enough to have Workflow Manager in the farm and therefore available SharePoint 2013 Workflows, you could use “App Step” instead of “Impersonation Step”. First you needed to enable “Workflow can use app permissions” site feature:

And then ready to go!
Find more about these features on Melissa Hubbard‘s blog: https://melihubb.com/2017/04/11/app-step-vs-impersonation-step/
How this can be done in Power Automate?
There are possibly many more ways than described by me below, however there is one principal rule behind them: you have to loose context of a user, so that Flow will use the credentials defined for the connection while it was created (usually Flow author, but you can use of course credentials of a pre-created “Service Account”).
Let’s imagine a scenario: you have a Flow, that handles the approvals and is triggered once an item is created (or modified, or both). Now you’d like to change status in the related item every time approval completes, but the user executing it shouldn’t have rights to modify the item anymore. See how this can be solved.
1) Trigger child flow
This is the most recommended approach. The only pre-requisite to use it is that both the child and parent flows must be stored inside a solution. In default environment solutions don’t cost anything, neither child flows, therefore this approach doesn’t require premium plans, unlike the other approaches described below.
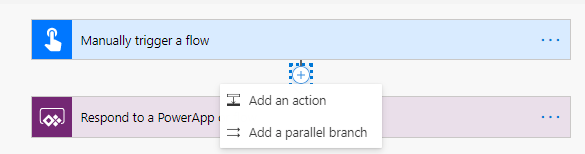
To use it simply create two flows inside a solution. First, the parent, put all the logic inside. Then, child. Child flow has to be triggered using “Flow button” as a trigger and “Respond to PowerApps or Flow” action to return data to parent flow:
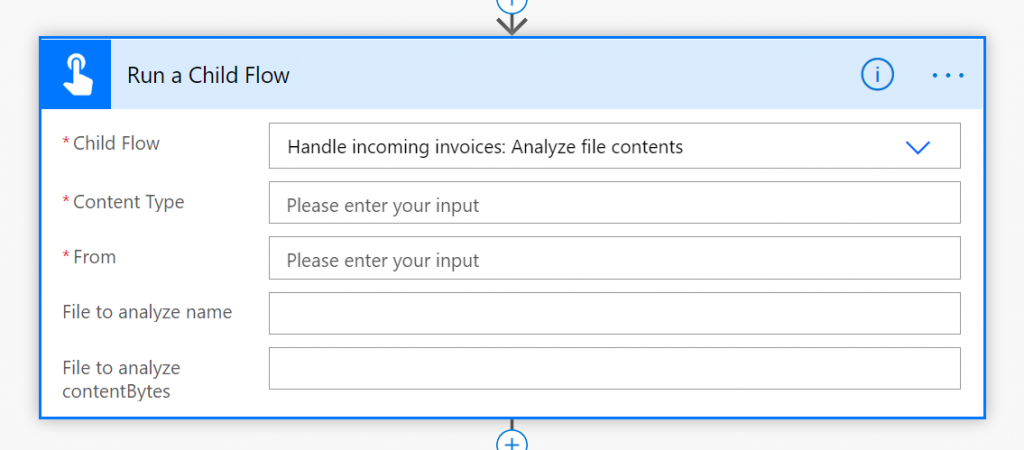
Next you simply need to put action in the parent flow “Call child flow” to pass data into the child flow and get outcomes:
All actions inside the child flow will be run using the connections defined during it authoring. Make sure to configure “Run only users” settings, as per my post here: Quick tip: flow cannot be used as a child flow.
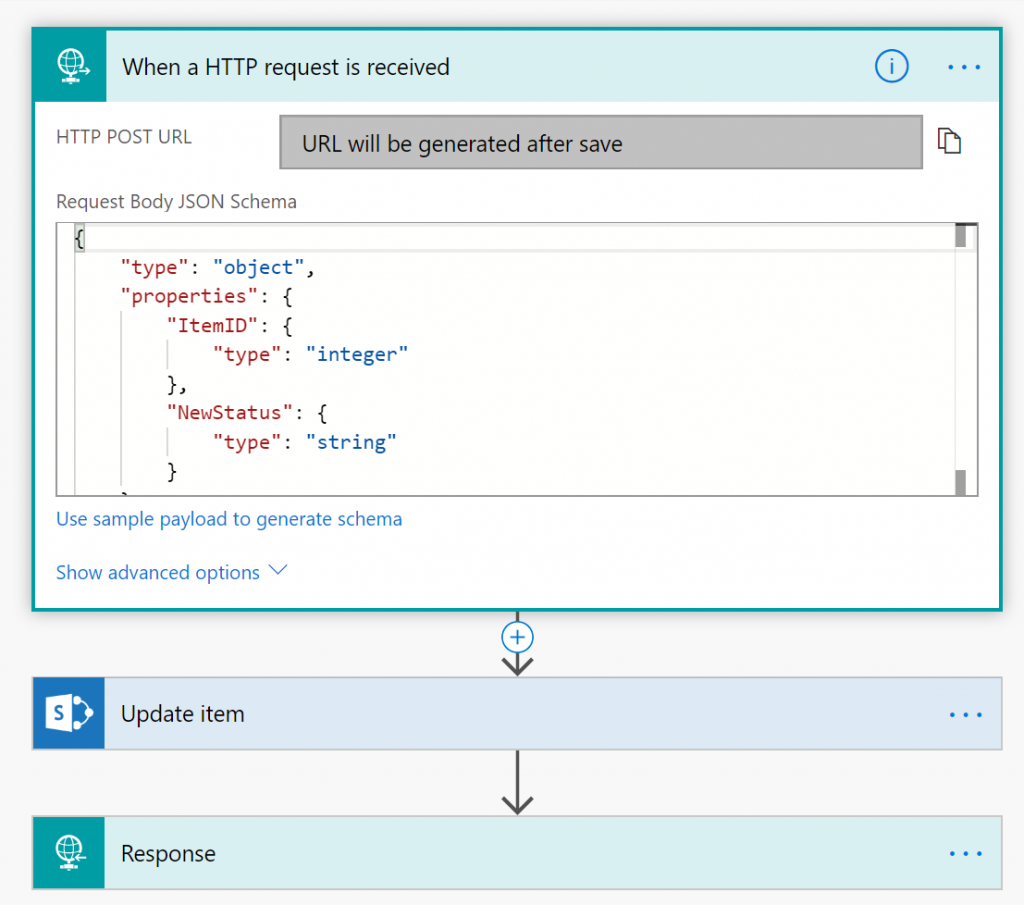
2) Trigger Flow via HTTP Request
Create second Flow that is being triggered using “When a HTTP request is received” action. Define it’s Request Body, e.g.:
{ "ItemID": 1, "NewStatus": "Completed" }
Remember to use also the “Response” action, so that the primary Flow will wait until update is completed:
Then simply call this Flow using “HTTP” action from the primary Flow.
Please remember, that using HTTP action in Flow requires Flow P1 subscription for author and users who are executing the Flow.
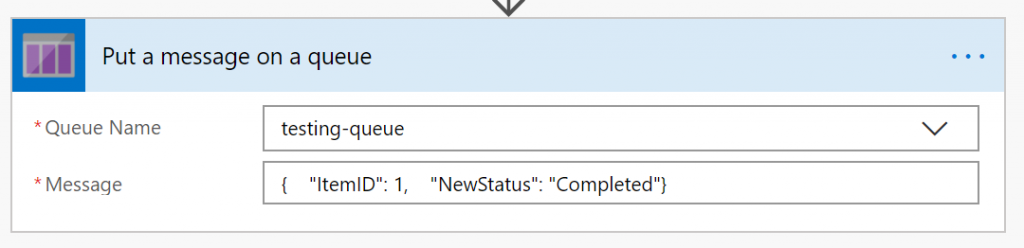
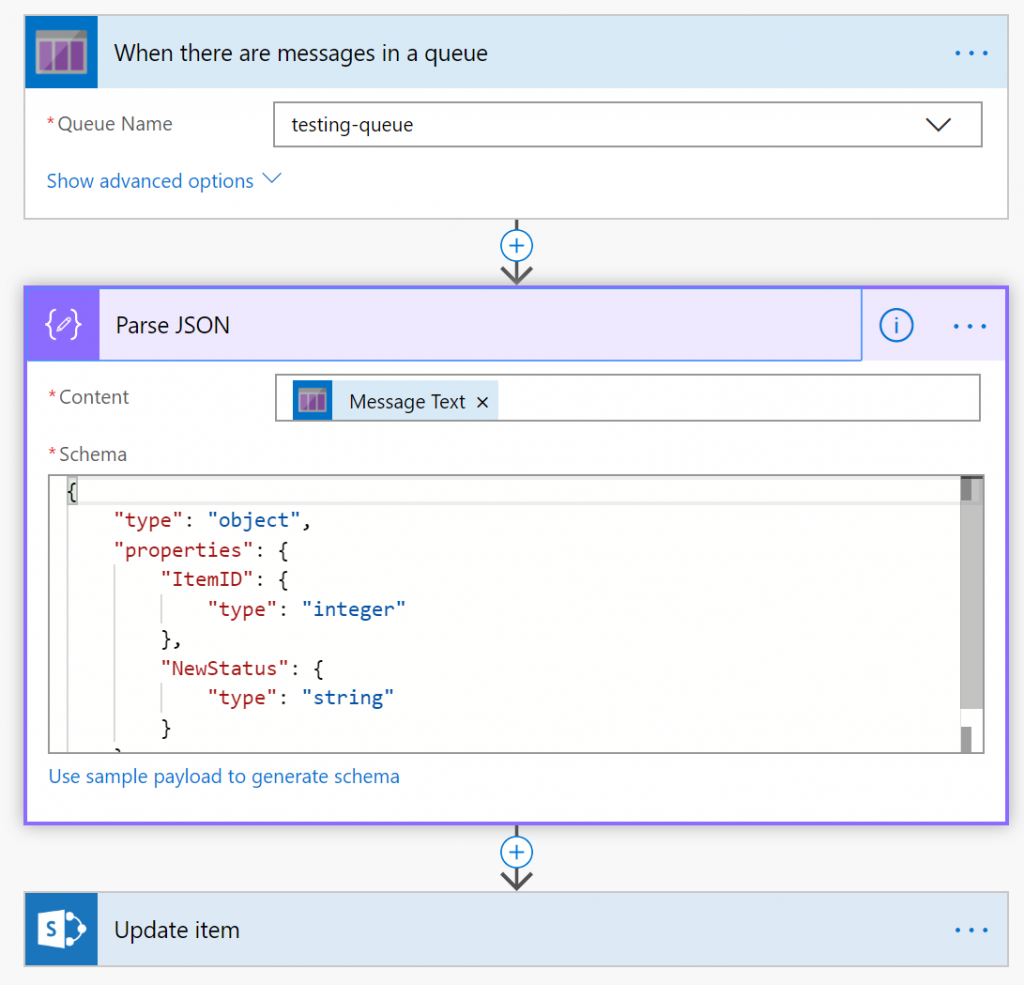
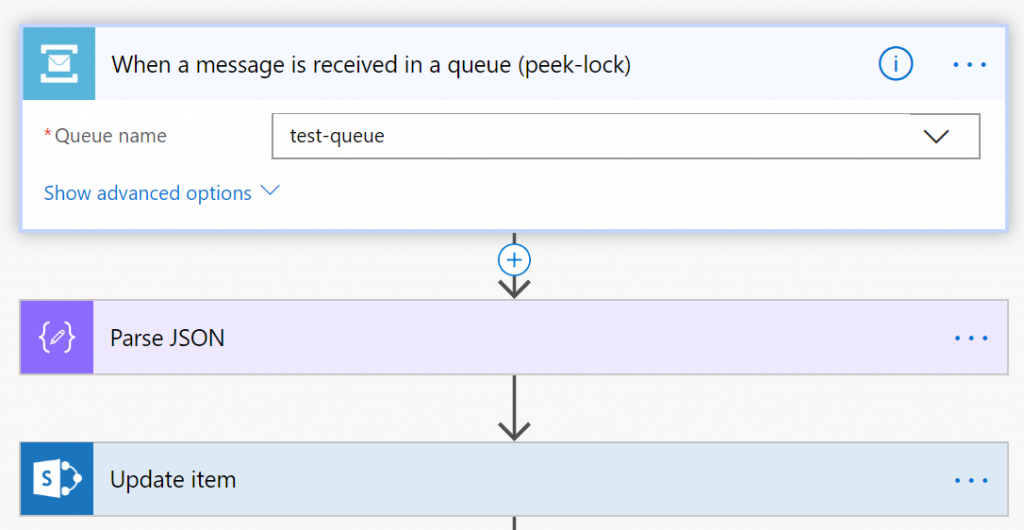
3) Trigger Flow via Azure Queue
In this solution you again have to create a second Flow, that is being triggered by “Azure Queues” action. Then once in your main Flow a task is completed, you need to simply put a message on the queue, e.g.:
Next create a second flow, that will read that message and update SharePoint item accordingly:
Although for this solution you don’t need Flow P1 subscription, but instead you need Azure Subscription available. The Azure Queue uses “Pay-as-you-go” model (see pricing: https://azure.microsoft.com/en-us/pricing/details/storage/queues/)
In this approach the main Flow will not wait until the second Flow is completed, since they are running totally independently. You can build a workaround, e.g. a loop that is checking if there are any messages in a queue and if there is a response message from the second Flow – move on. Otherwise pause for e.g. 10 seconds:
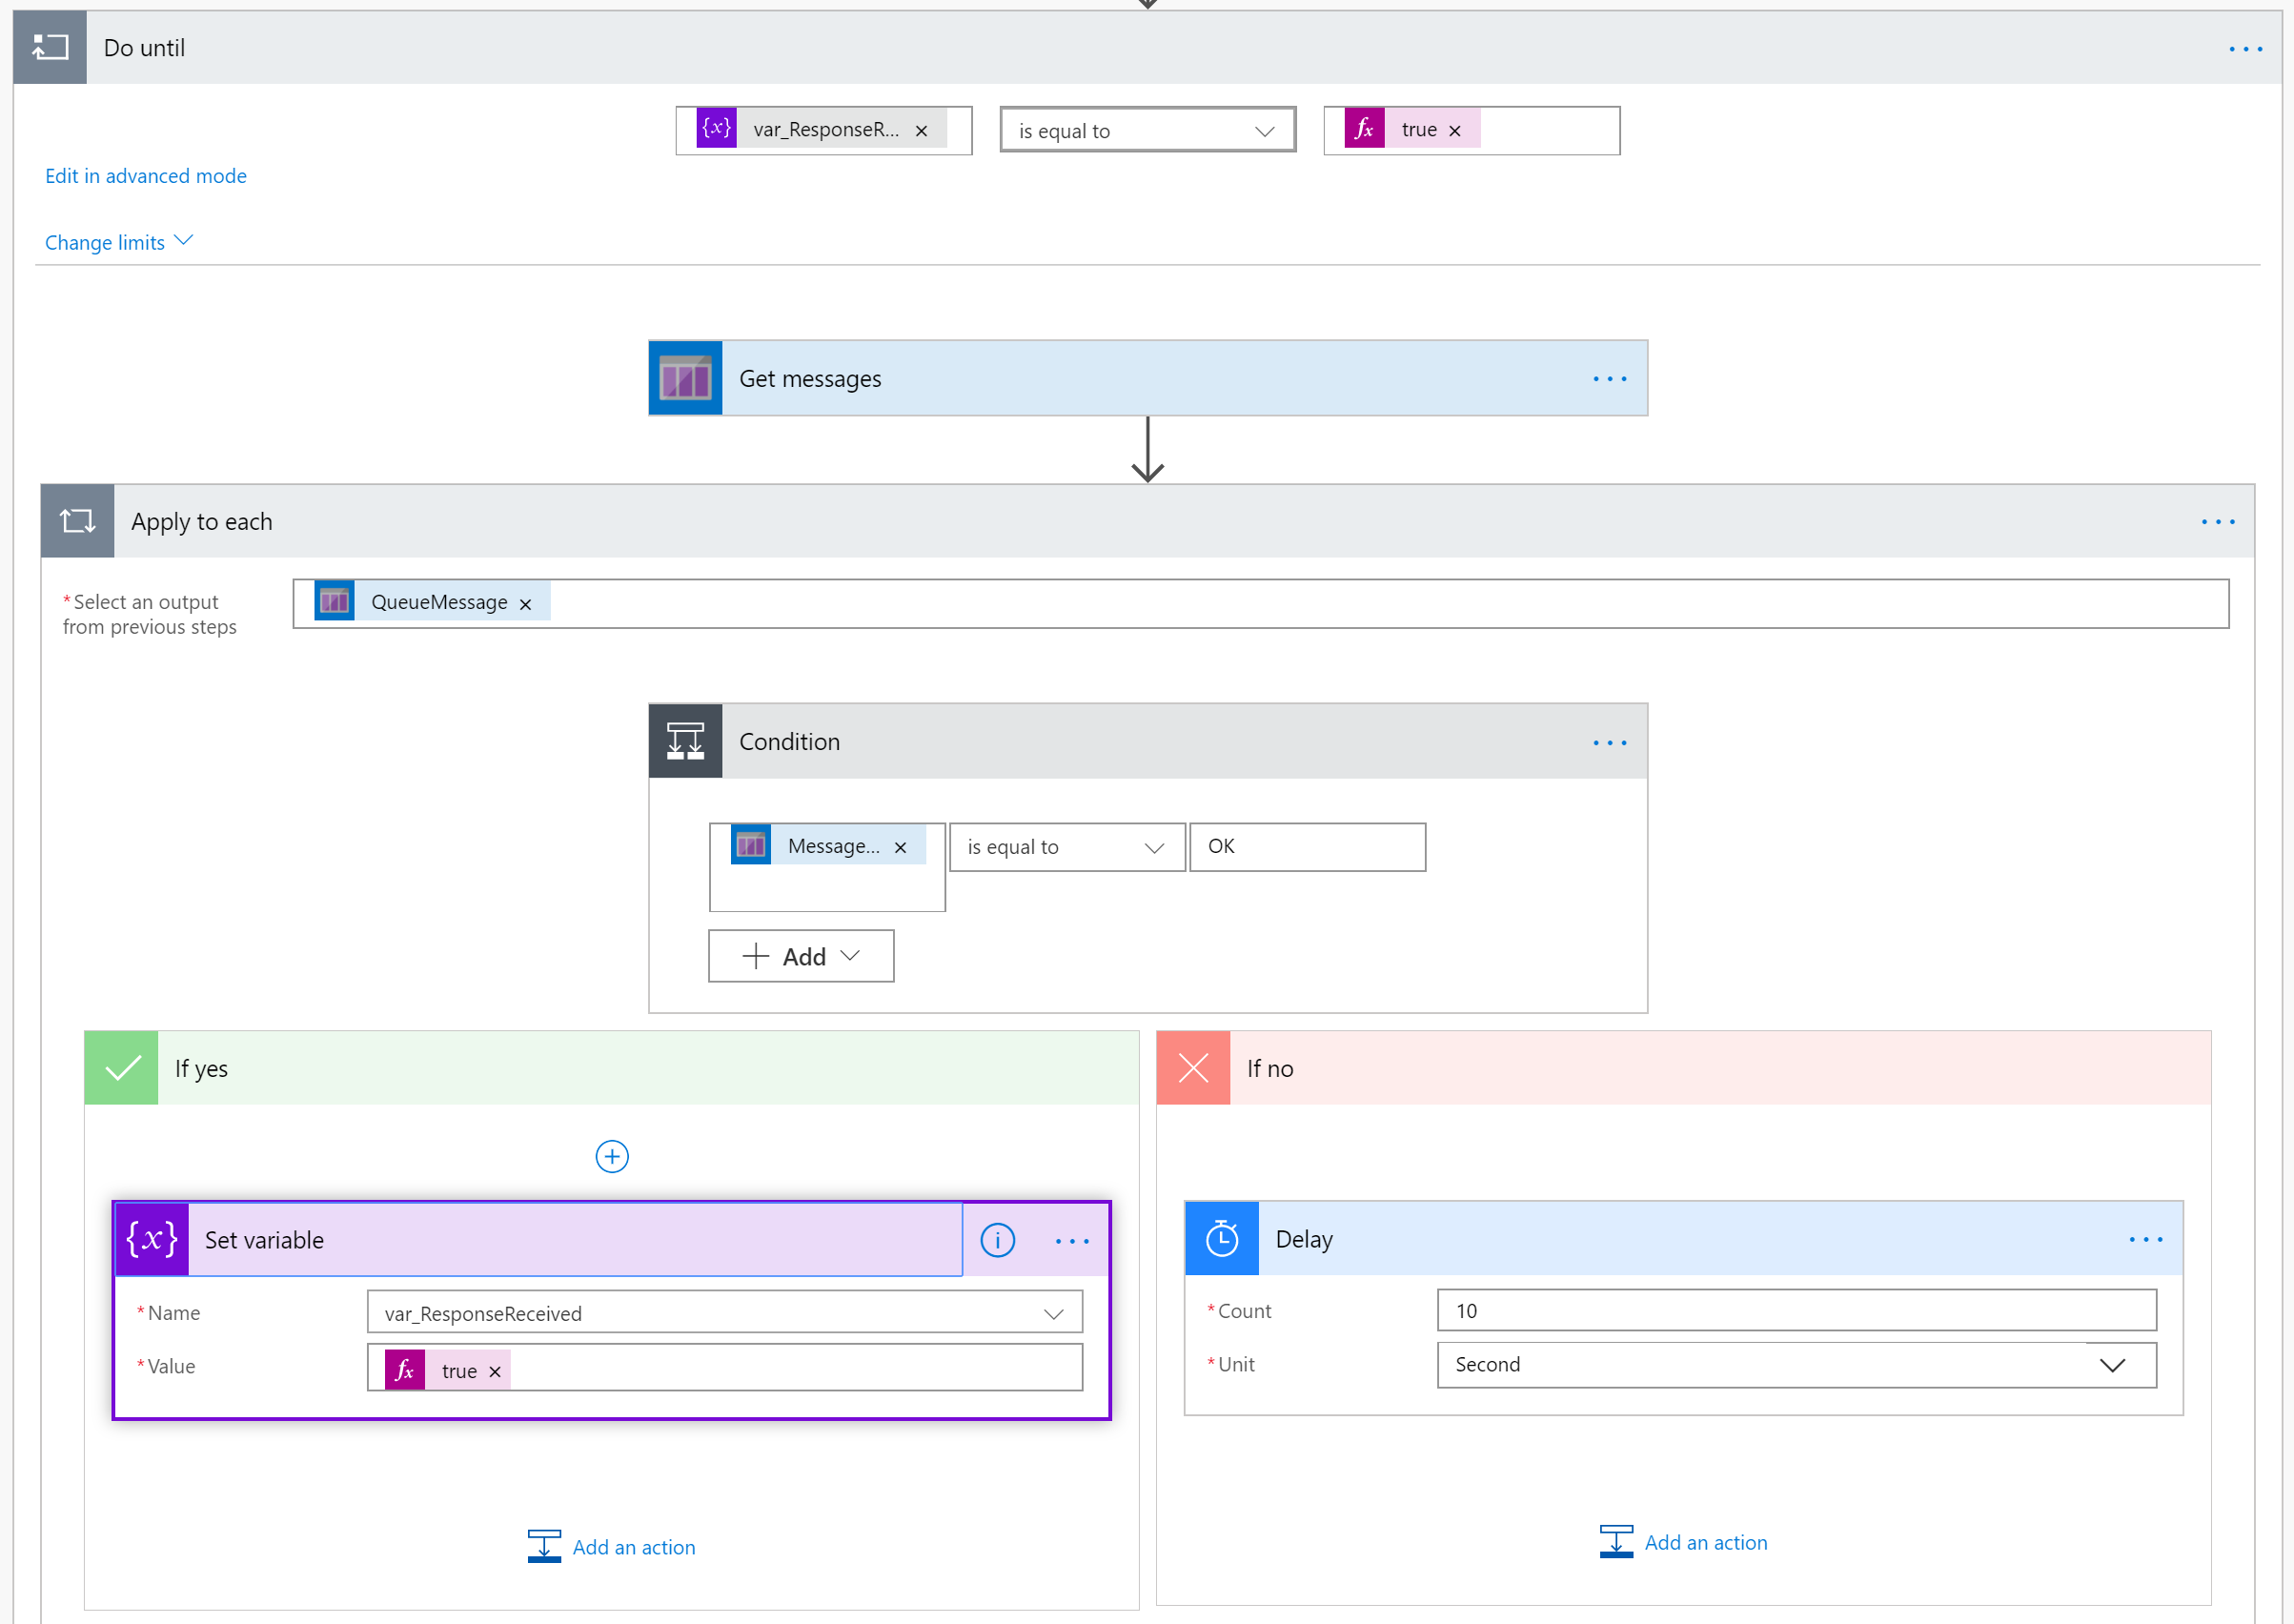
You can as well count messages in the Queue, once number is 0 means the item is updated.
4) Trigger Flow via Azure Service Bus
Similar to Azure Queue, Service Bus also offers a queue, where primary Flow can store a message and the second one, that is triggered using the “When a message is received in queue” action. Then it updates the item and finally can delete the message from queue.
For this solution you also need Azure Subscription available. The Azure Service Bus uses “Pay-as-you-go” model (see pricing: https://azure.microsoft.com/en-in/pricing/details/service-bus/)
Learn here what are the differences between Azure Service Bus and Storage Queue:
- https://docs.microsoft.com/en-us/azure/service-bus-messaging/service-bus-azure-and-service-bus-queues-compared-contrasted
- https://www.c-sharpcorner.com/UploadFile/fe6121/deep-dive-into-azure-storage-queue-vs-azure-service-bus-queu/
5) Use Azure Function
The last solution I would be thinking of is the Azure Function. However it is the most complicated approach and I see no real benefits. Also, to call an Azure Function you again have to do it by either HTTP trigger, or Queue trigger, so you need still to have either P1 subscription or only Azure Subscription.
The major benefit from using Azure Function is that you can register it in AAD and grant it access using “Application permissions”:
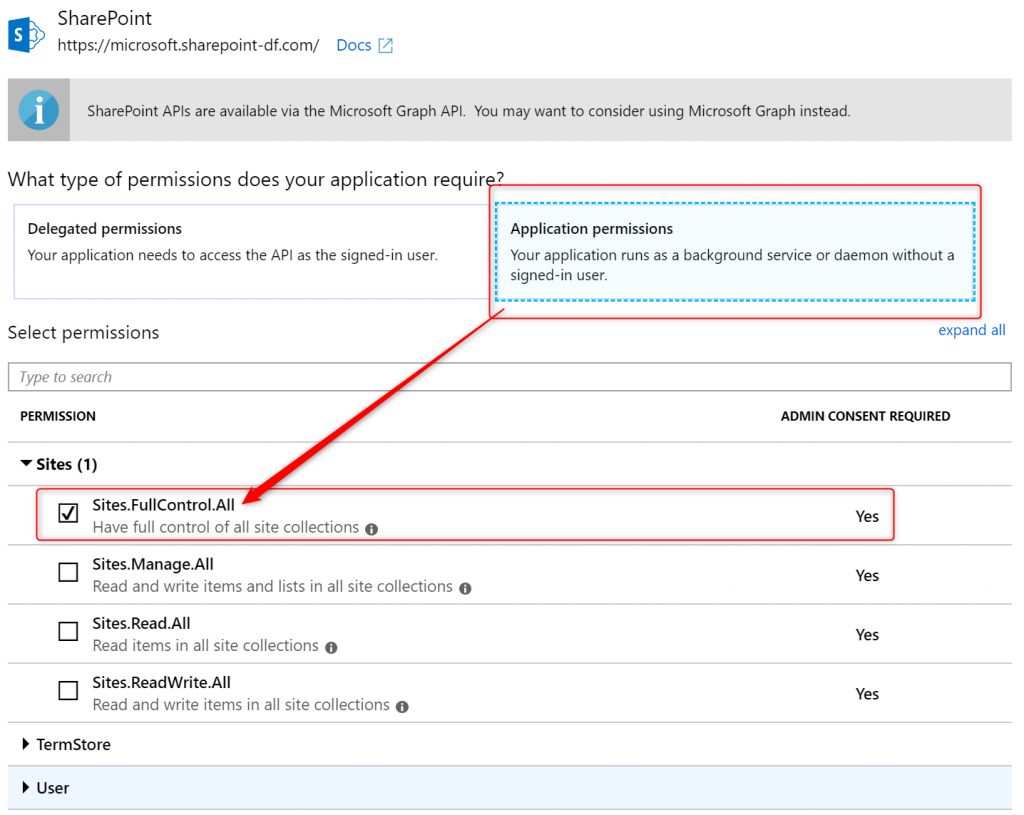
This will result in a real case, that an item is actually being updated by a system account, not any named “service account”.
Thanks for reading! If you have any questions leave them in comments box below or contact me directly!


Pavel Sheludkov
Great, thank you!
I’ve been using the first option and it’s good to know alternatives.
Tomasz Poszytek
You’re welcome 😀
OOB
options 2 and 3 now require premium connectors so P1 licences
a workaround without extra licence could be to use a SharePoint list or library as “message bus ” between two flows, the second flow being triggered by the itemcreated event and running under a serviceaccount
Tomasz Poszytek
Correct. You can as well use child flows. They are free to use in default environment since they must be added into a solution.
Sabrina Schmid
What is the difference to simply changing the setting for the run-only users to “use this connection”?
Tomasz Poszytek
Basically that every run of this flow will be executed using the connection defined by the creator of the flow, not the user who triggered it.